


Beer can chicken is one of my favorite summer grilling recipes! Though it might seem like a silly cooking method, think of it as the best rotisserie chicken EVER.
The beer steams the perfectly seasoned chicken from the inside so that the chicken stays moist while the outside gets crispy and delicious. This beer can chicken recipe also makes for a fun presentation that’s perfect for Summer BBQs.
Table of Contents
Creating This Recipe
The first time I made beer can chicken was about 10 years ago when I was teaching a cooking class in San Diego on cooking with beer and I fell in love!
I love a good roast chicken and this method yields some of the best chicken ever. The skin is perfectly crispy and the meat stays moist and juicy. What more could you want?
We’re going really simple with our spice rub here and just using some of the classics like paprika, garlic, onion, brown sugar, and ground mustard. The end result is a chicken that will impress everyone at your next summer BBQ!
What is Beer Can Chicken?
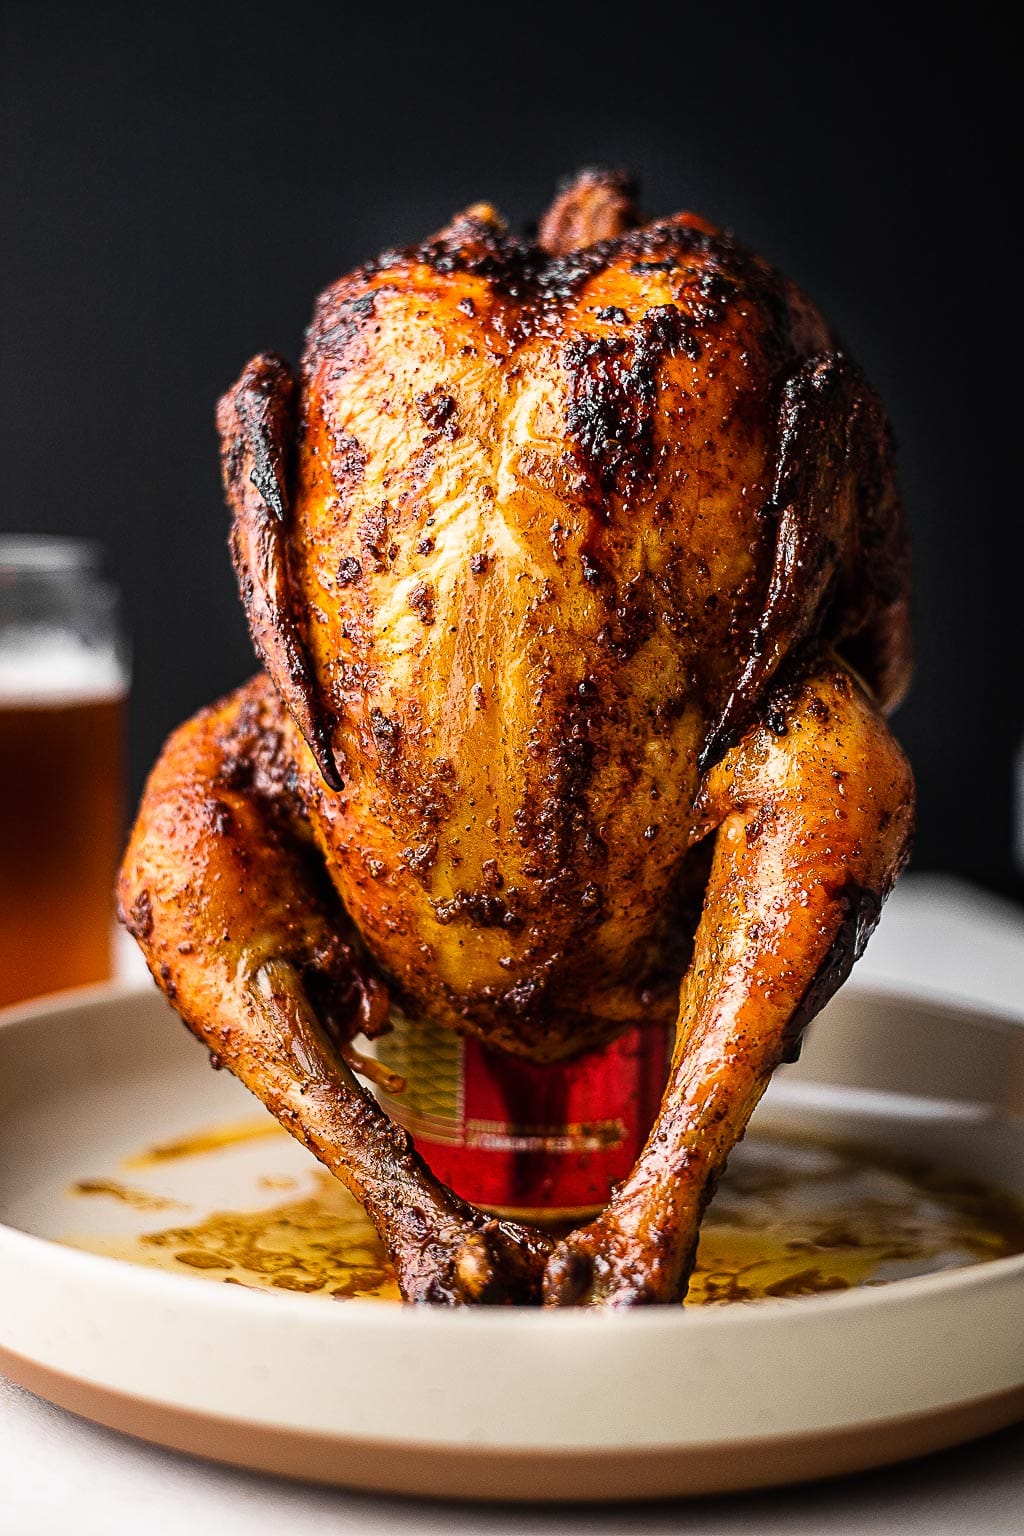
Beer can chicken, also known as beer butt chicken or drunken chicken, is a cooking method that involves grilling or roasting a whole chicken while it is perched on a partially filled beer can.
The concept behind beer can chicken is to infuse the chicken with moisture and flavor from the beer while the can acts as a stand, helping to keep the chicken upright during cooking.
As the chicken cooks, the beer inside the can heats up and releases steam, creating a moist cooking environment and imparting some of the beer’s flavors into the chicken. The origins of the recipe is murky, but most agree that it was developed in the South in the last few decades.
Ingredients and Substitutions
- Whole chicken. Opt for a quality chicken that’s about 4-5 lbs.
- Olive oil. No need to use the good stuff, any olive oil or neutral oil will do.
- Garlic. I love the flavor that fresh garlic gives, but you can swap in garlic powder too.
- Brown Sugar. Brown sugar adds a touch of sweetness and helps the skin really caramelize and get crispy.
- Spices. The spice rub for the chicken on a beer can is made from paprika (use smoked or regular), ground mustard, onion powder, salt, and pepper.
- Beer. I like using a light beer like a lager or a malty brown ale here. I tend to avoid really hoppy beers as it can make the chicken bitter.
What’s the Best Beer for Beer Can Chicken?
While you can really use just about any 12 oz can of beer for beer can chicken, in my opinion the type of beer matters! I avoid hoppy beers like IPAs and Pale Ales because they can leave a bitter flavor to the chicken.
My favorite beers for making beer can chicken are:
Dry crisp beers. Lagers, Pilsners, and Kolsches are light and perfect for cooking with (or drinking while cooking).
Malty ambers and browns. I love using a good brown ale, especially a craft beer with unique flavors like coffee, chocolate, or coconut.
Light stouts. A beer like Guinness also works great for this recipe. Stay away from imperial stouts because they’re usually expensive and they won’t impart enough flavor to make the cost worth it.
Tools Needed
How to Grill or Bake Beer Can Chicken
This easy beer can chicken recipe is one you’ll turn to over and over again! The end result is a flavorful and delicious chicken worthy of being the centerpiece of any meal.
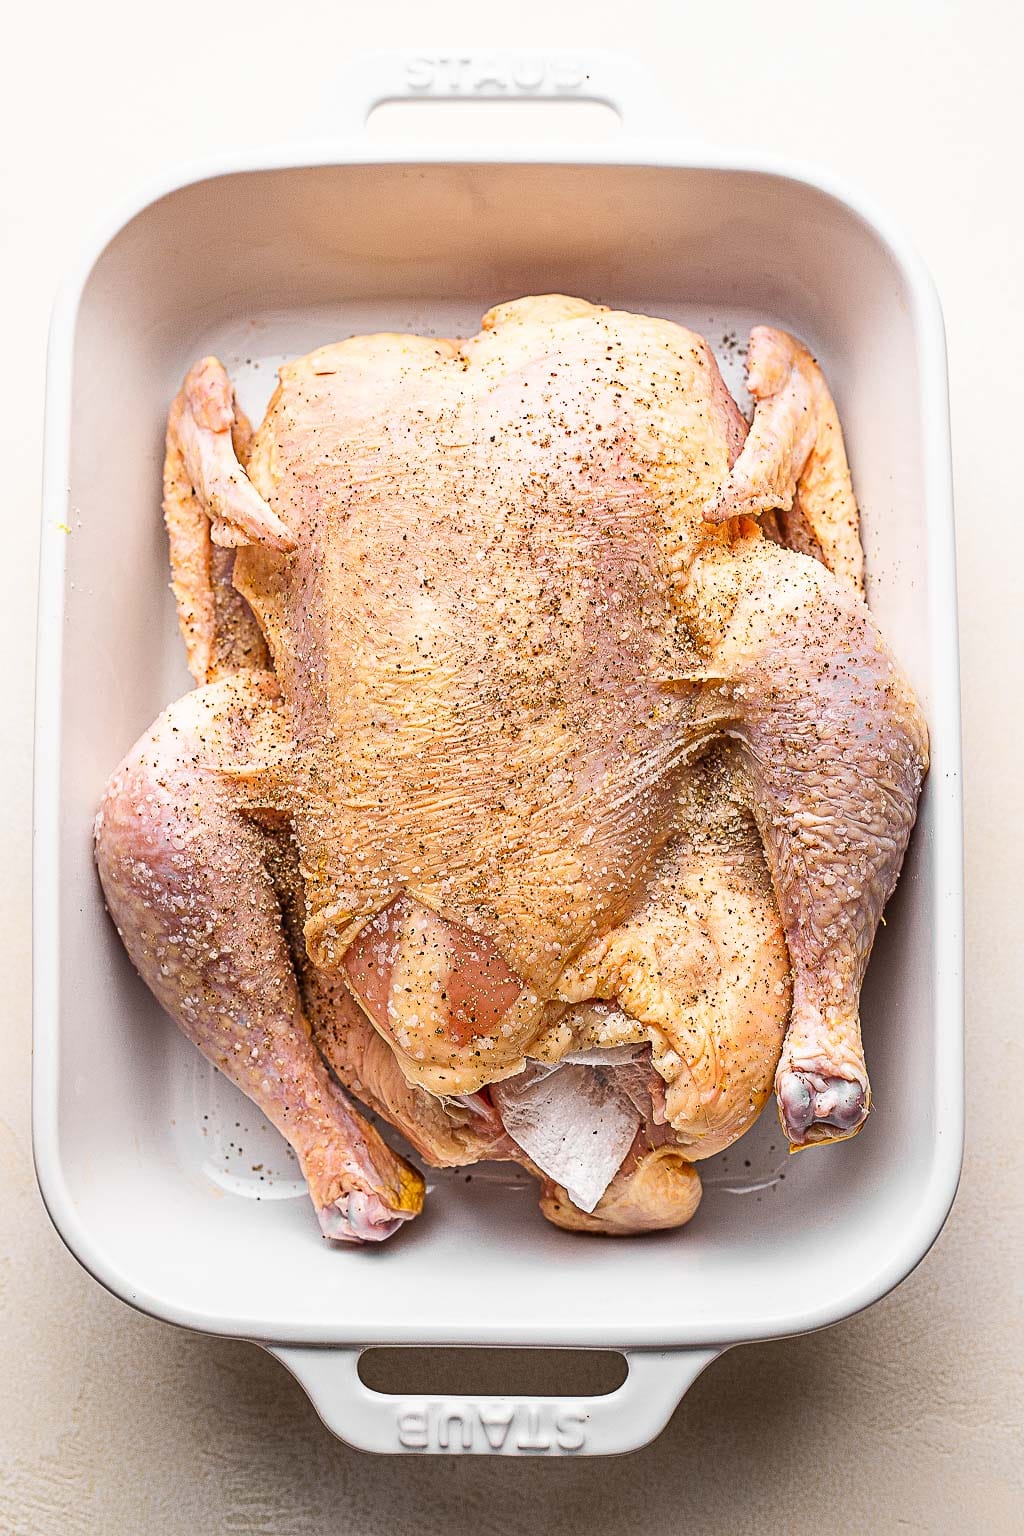
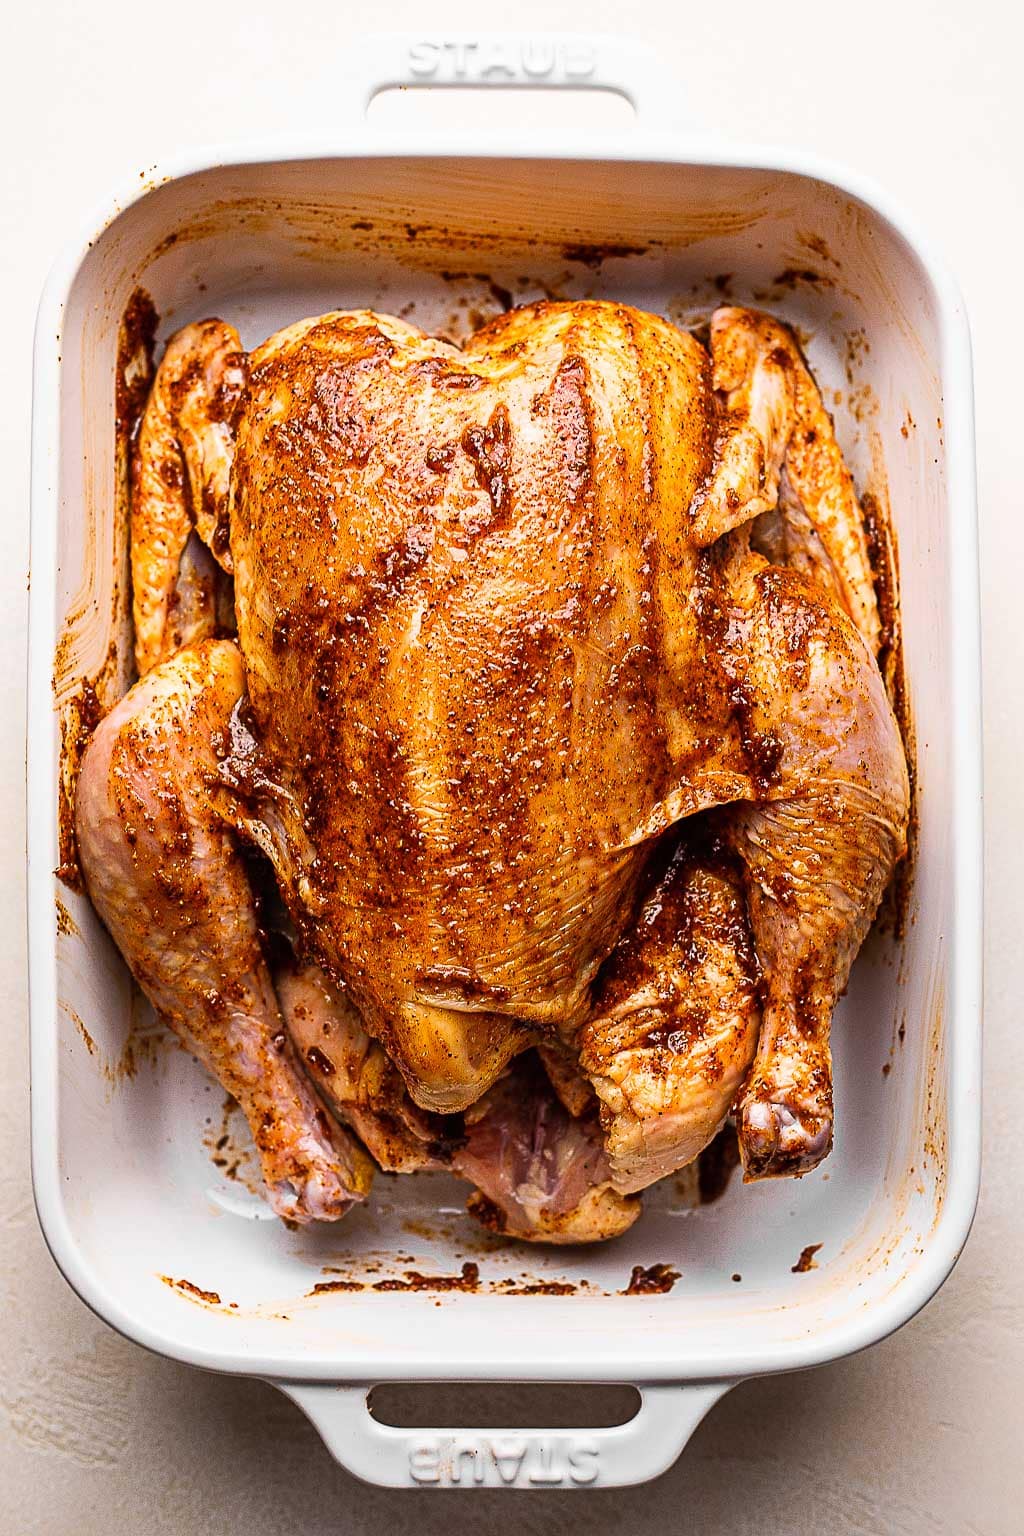
- Season, rub, then chill the chicken. Season your chicken liberally several hours before cooking the steak so that the seasoning really has time to permeate. We’re essentially doing a really simple dry brine and that is my secret to getting juicy chicken every time. When you’ve got 2 to 4 hours before cooking the chicken, massage the spice rub all over it and return to the fridge.
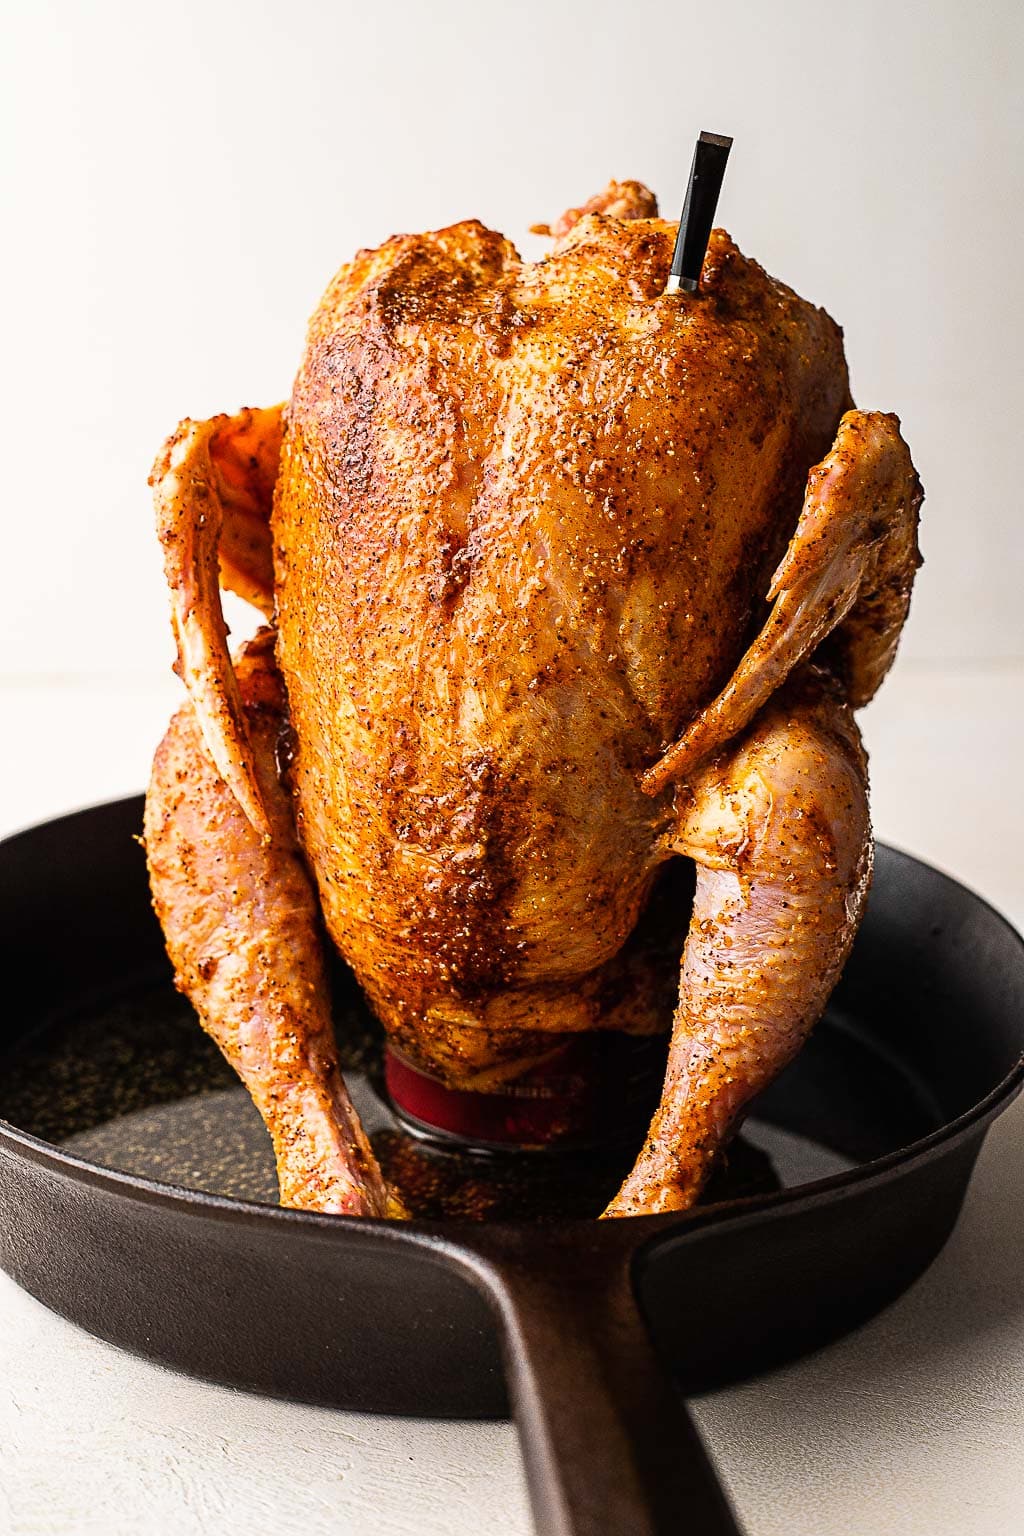
- Place the beer can in the chicken. Pour HALF of the beer into an oven- / grill-safe skillet (I prefer using my cast iron skillet). Then nestle the beer can inside the cavity of the chicken and arrange the bird so it stands upright and is stable.
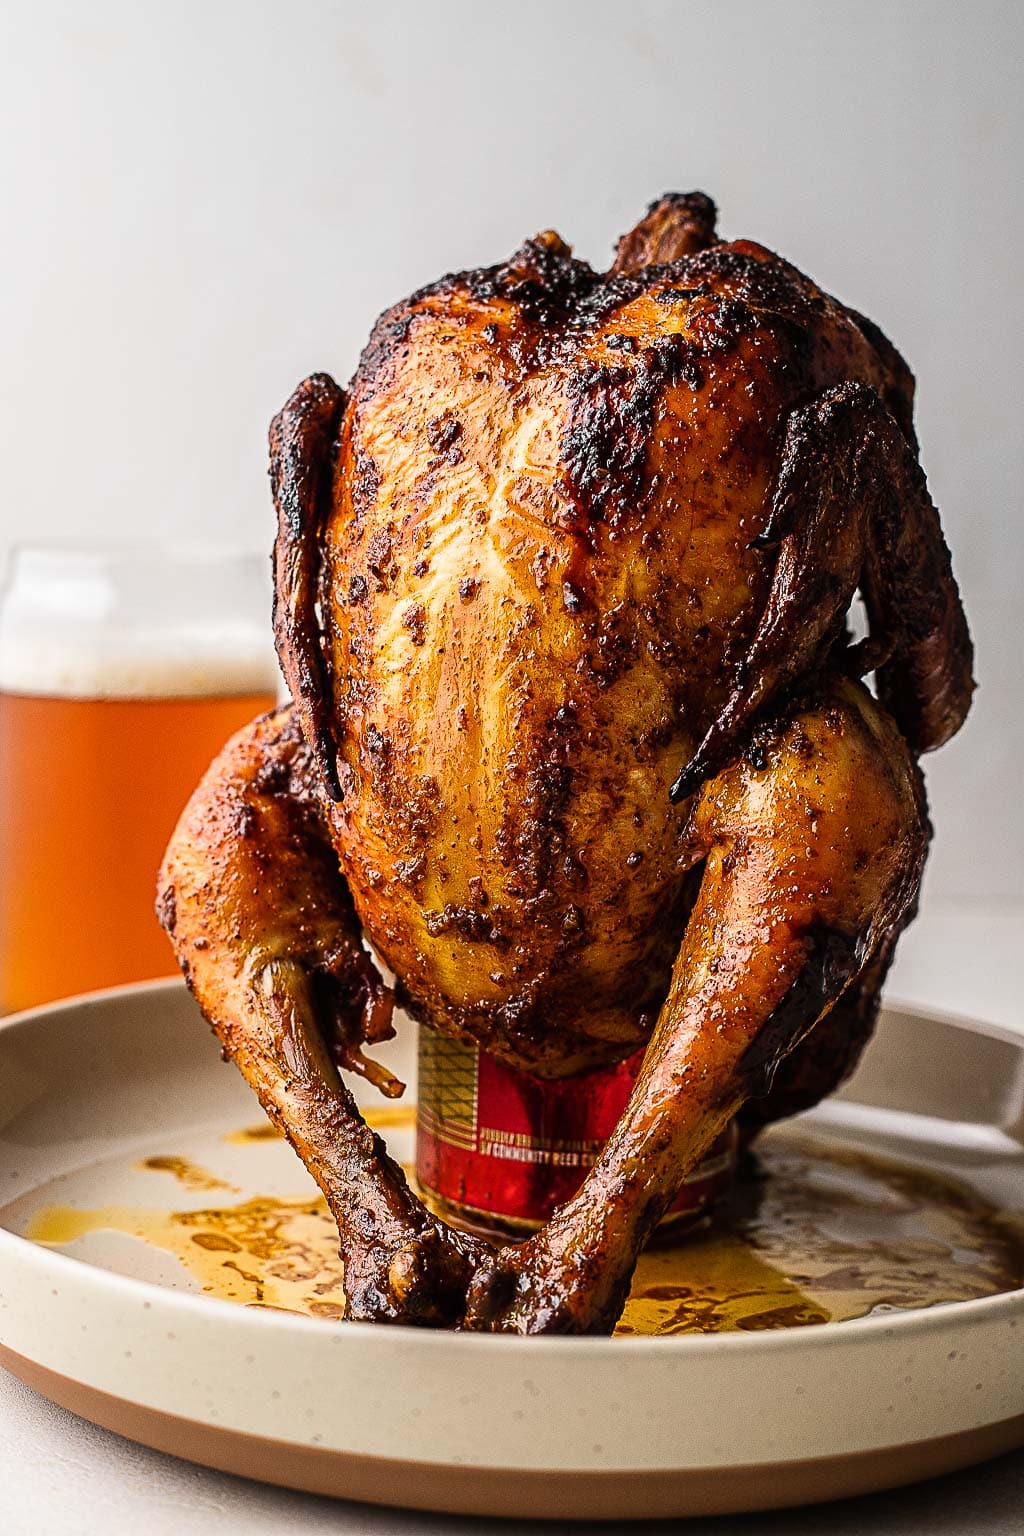
- Grill or bake the chicken. The cook time will be roughly the same whether you’re making grilled or baked beer can chicken (roughly 90 minutes). You’ll know the chicken is done when the thickest part of the thigh registers at 165 F on a meat thermometer.
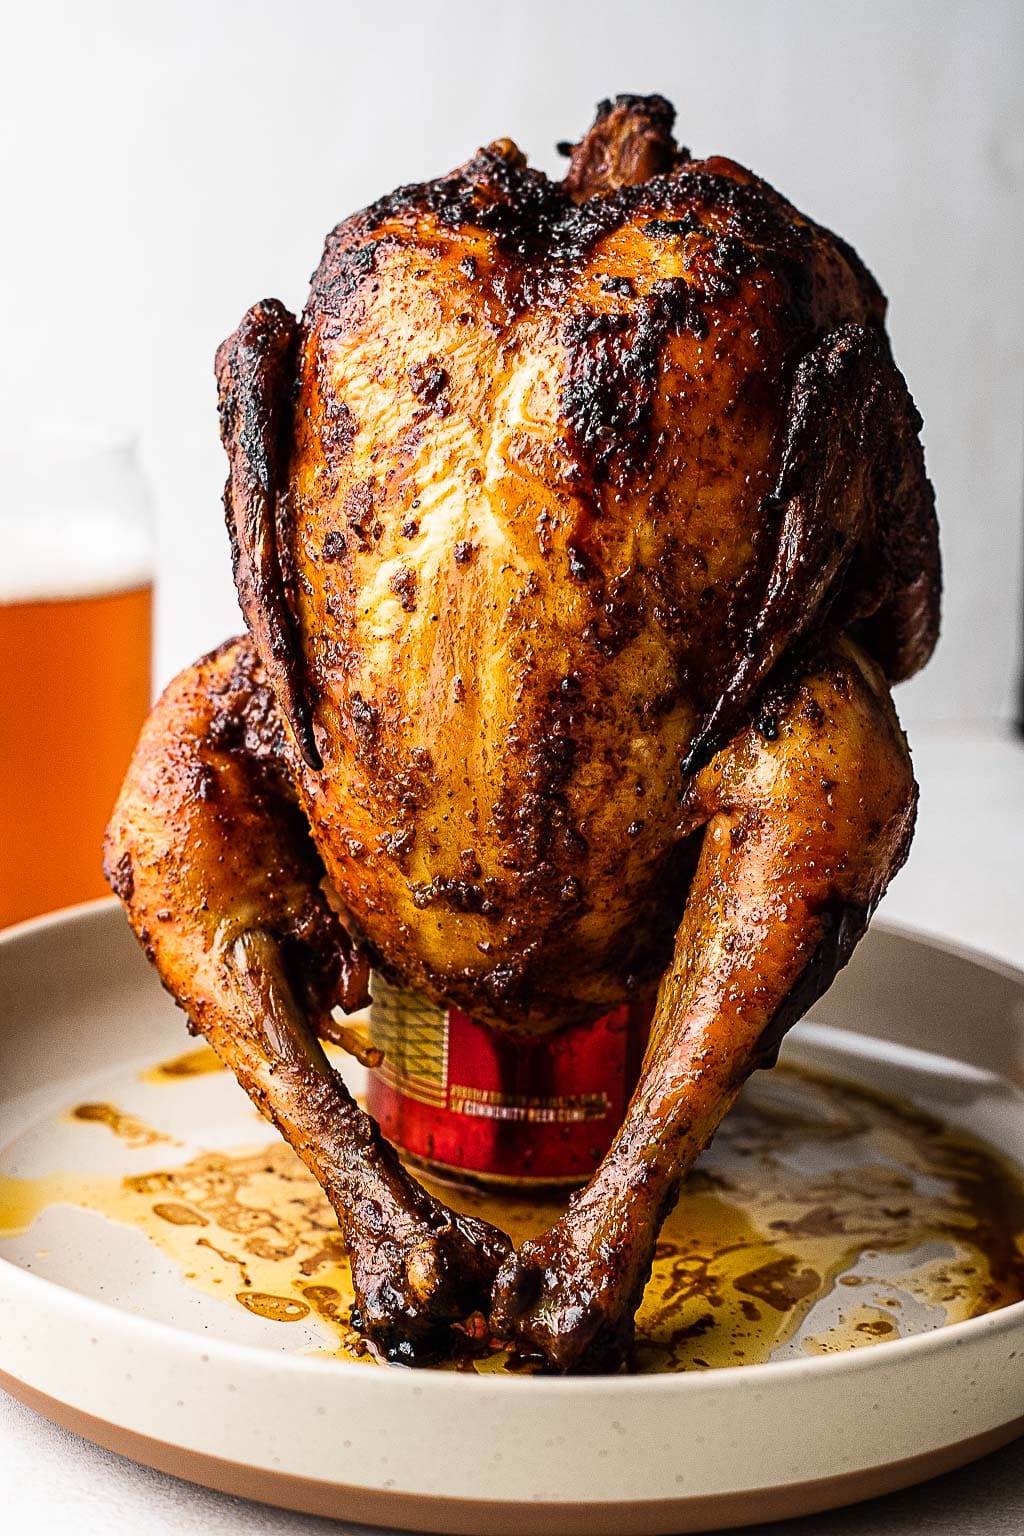
- Let rest. You don’t want to carve the chicken until after it’s had 10 to 15 minutes to rest. This gives the juices time to redistribute throughout the meat and makes for the most tender bite.
Jenny’s Tip: Are the wings starting to darken but the breasts and thighs aren’t ready yet? Cover the wings with foil to prevent them from burning.
More Tips for Making This Recipe
- Choose the right size chicken: Opt for a chicken in the 4-5 pound range. This size works well with a standard beer can and ensures even cooking.
- Preheat the grill or oven: Before placing the chicken on the heat source, preheat your grill or oven to medium-high heat. This ensures a consistent cooking temperature and helps crisp up the skin.
- Embrace cooking zones on the grill: Heat one side of the grill to high heat, and the other side to low heat. This allows the chicken to cook at a lower rate so that the outside doesn’t burn.
- Use a meat thermometer: To make sure your chicken is cooked to the perfect temperature, always use a meat thermometer. My favorite meat thermometer can be found HERE.
Storage & Reheating Instructions
To store: If you have leftovers, it’s important to store them properly to maintain their quality. Remove any remaining chicken from the beer can and place it in an airtight container. Store it in the refrigerator and try to consume it within 2-3 days for the best flavor and texture.
To reheat: Preheat your oven to around 350°F (175°C). Place the chicken in a baking dish or on a baking sheet and cover it with foil to prevent drying out. Reheat for approximately 15-20 minutes, or until the internal temperature reaches 165°F (74°C). Keep an eye on the chicken to avoid overcooking.
What to Serve with Beer Can Chicken
The crispy beer can grilled or baked chicken is the main event, but what is a great dinner without sides? Here are some of my favorite side dish recipes to serve with chicken:
- Hawaiian-style Mac Salad
- Dressed-up Baked Beans
- Sweet Potato Fries
- Creamy Pesto Pasta Salad
- Lemon-Dill Rice
- Creamy Spinach and Feta Orzo
- Grilled Lemon Parmesan Asparagus
- Loaded Twice Baked Potatoes
Jenny’s Tip: You can also chop up the chicken and serve it as tacos alongside my Mexican Rice, Instant Pot Refried Beans, and my Best Ever Guacamole. Serve with my homemade Salsa Verde!
This crispy and juicy Beer Can Chicken is one of my favorite summer grilling recipes! It’s great for a fast weeknight meal as well as any backyard BBQ. If you do give it a try, be sure to let me know! Leave a comment with a star rating below. Be sure to subscribe to my weekly newsletter and never miss a new recipe! You can also snap a photo & tag @JENNYGOYCOCHEA on Instagram. I LOVE hearing about & seeing your SMF creations!
This post may contain affiliate links from which I receive a small commission at no additional cost to you. Affiliate links allow me to keep providing great recipes for free and I never recommend products that I don’t love and personally own.
More Whole Chicken Recipes to Try
- Roast Chicken Piccata
- Dutch Oven Roast Chicken
- Mexican Grilled Chicken
- Spatchcock Herb Roasted Chicken
Beer Can Chicken Recipe
Ingredients
- 1 – 4 to 5 lb whole roasting chicken
- 1 – 12 oz can of beer
- kosher salt
- freshly cracked pepper
- 4 tablespoons unsalted butter , melted
Spice Rub
- 1/4 cup olive oil
- 3 garlic cloves , grated
- 2 teaspoons paprika
- 1 teaspoon onion powder
- 1/2 teaspoon ground cumin
- 1/2 teaspoon ground mustard
- 1 tablespoon brown sugar
Instructions
- Season the chicken. About 6-8 hours before you plan to cook, pat your chicken dry and remove any of its innards. Season liberally, inside and out, with salt and pepper. Lay the chicken on a plate or on a small baking sheet and transfer to the fridge uncovered.
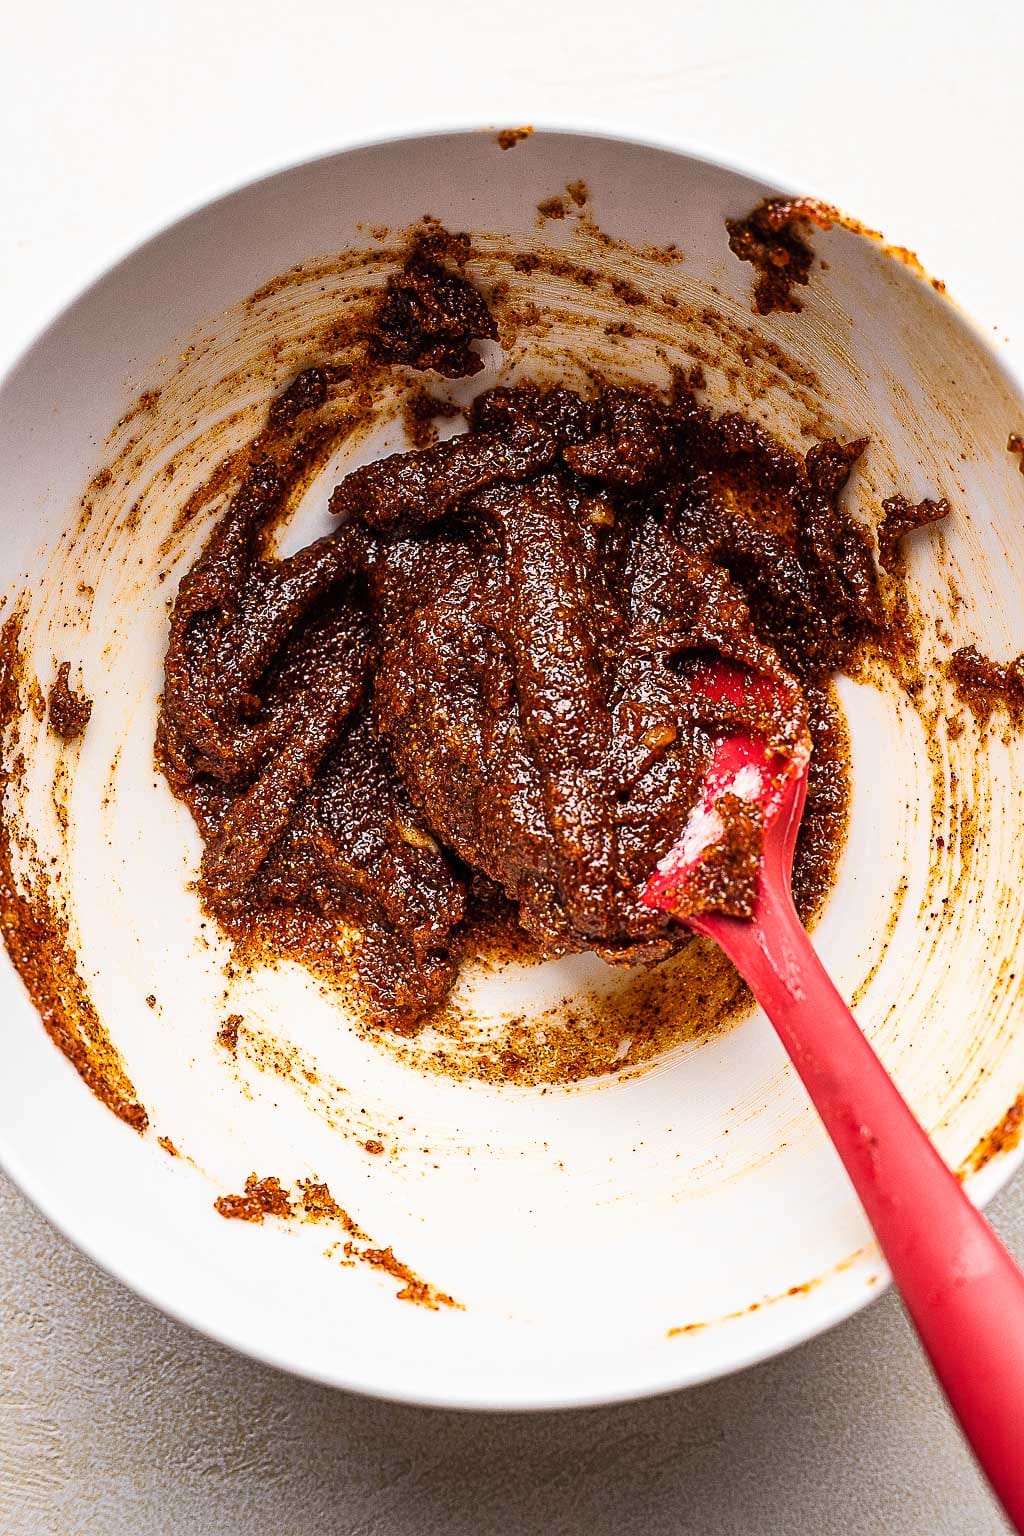
- Mix the rub. Combine all the rub ingredients in a small bowl and add the olive oil. Stir well until it resembles a paste.
- Rub the chicken. Massage all the rub into the chicken, really taking care to get in all the nooks and crannies. Return the chicken to the fridge for 2-4 hours.
To Grill the Chicken:
- Prep the grill. Before using your grill, make sure to clean the grates of any food and debris. Preheat an outdoor grill where one side is medium-high heat and the other side is low heat. Close the lid and wait until the temperature reaches 375 F.
- Prep the chicken. Open a can of beer and pour half of it into a 10" cast iron or oven/grill-safe skillet. Place the can in the center of the skillet and gently ease the chicken onto the can so that the can is inside the chicken cavity and the chicken is upright and stable.
- Grill the chicken. Place the skillet with the chicken on the cooler side of the grill and close the lid. Baste with juices and the melted butter every 15 minutes after the first 30 minutes of cooking. Maintain the heat at around 350-375 F and cook for about 90 minutes. If the wings start to get too dark, cover them with small pieces of foil. Cook until the thickest part of the thigh registers at 165 F on a meat thermometer.
- Rest. Remove the chicken from the grill and lightly tent with foil. Let the chicken rest for 10-15 minutes before slicing.
To Bake the Chicken:
- Preheat the oven. Move the oven racks to the lower 1/3 of the oven and preheat to 375 F.
- Prep the chicken. Open a can of beer and pour half of it into a 10" cast iron or oven/grill-safe skillet. Place the can in the center of the skillet and gently ease the chicken onto the can so that the can is inside the chicken cavity and the chicken is upright and stable.
- Bake. Transfer the skillet to the oven. Baste with juices and melted butter every 15 minutes after the first 30 minutes of cooking. If the wings start to get too dark, cover them with small pieces of foil. Cook until the thickest part of the thigh registers at 165 F on a meat thermometer, about 90-110 minutes.
- Rest. Remove the chicken from the oven and lightly tent with foil. Let the chicken rest for 10-15 minutes before slicing.

Rate & Review This Recipe
Do you have to use a skillet or can you use a casserole dish or oven safe pan? I plan to try this recipe tonight.
Thanks,
Zach
Hi, either should be fine!