

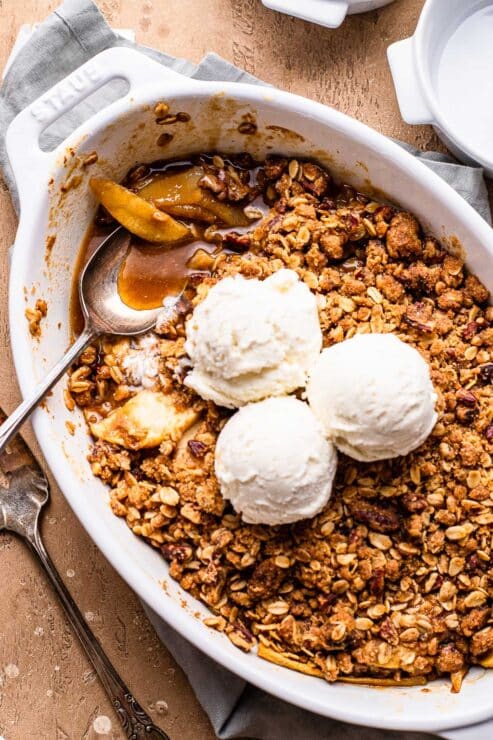
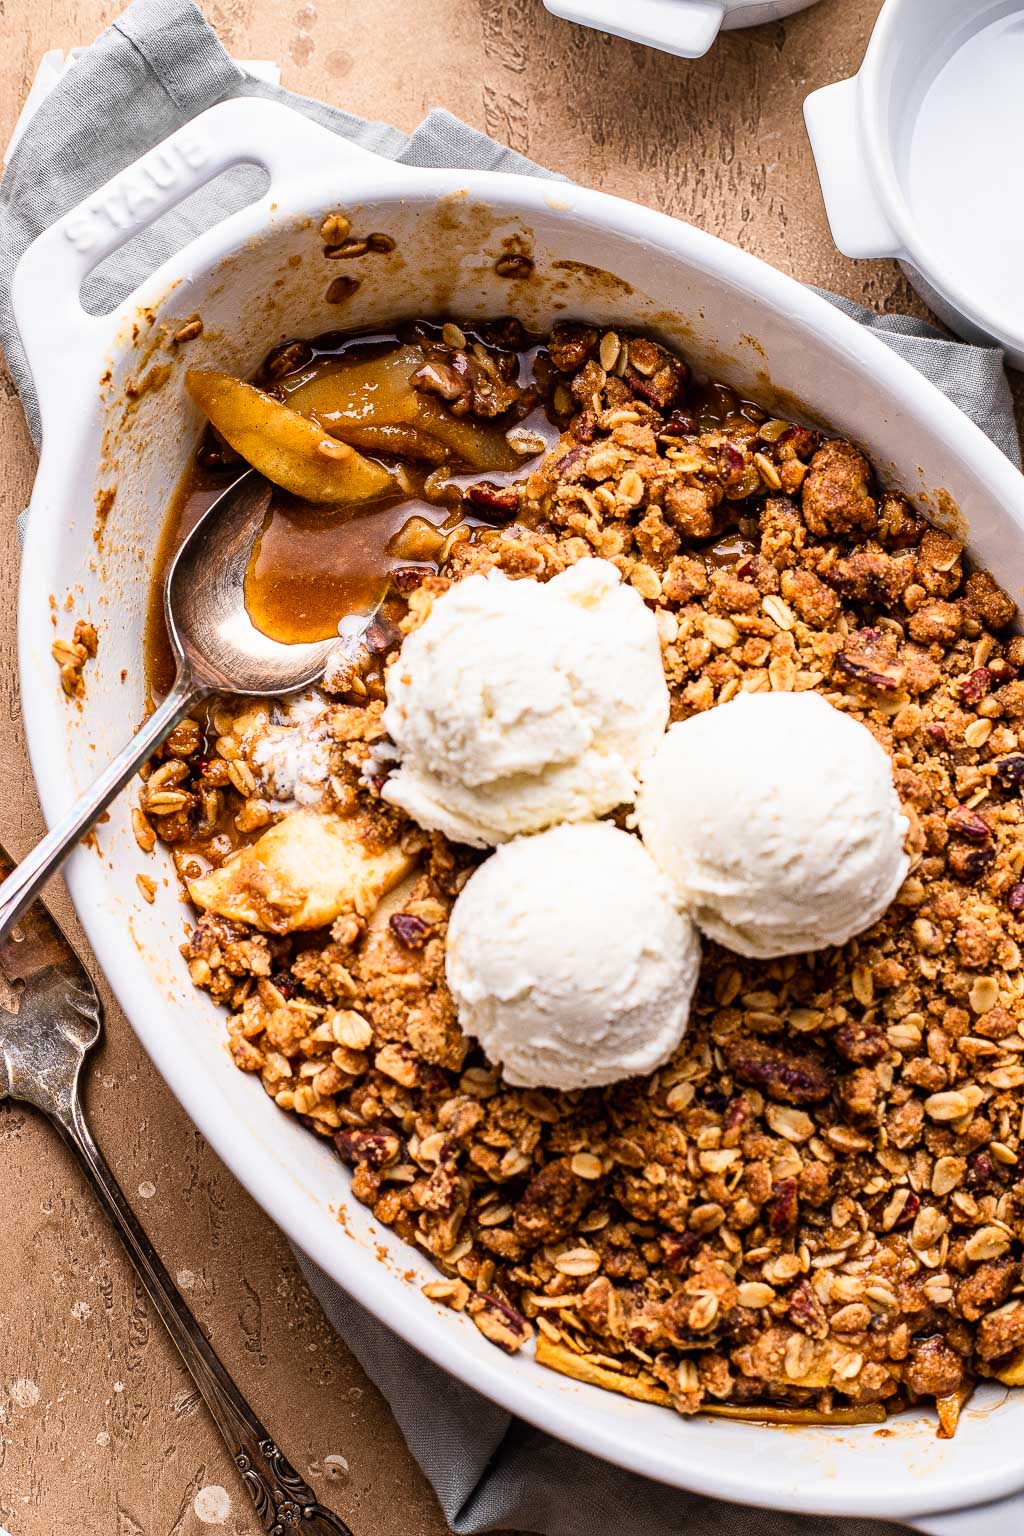
This delicious Apple Pear Crisp is bursting with cinnamon-spiced fall fruits. It’s a perfect low-effort dessert that still feels and tastes impressive! The tender apple and pear filling combined with the crispy oat-pecan topping makes this a knockout dessert for any fall or Thanksgiving gathering.
“This is sooo good! I made this for dessert and the apple cider braised pork for dinner and it was amazing!! I am a novice cook and I was able to execute this just fine. Just make sure you have a good peeler!” – Alexandra (So Much Food reader)
Table of contents
The Ultimate Fall Fruit Crisp
While I do adore traditional fruit pies with flaky pie crust, crisps are so much easier to make and are equally show-stopping. Another welcome benefit during the busy holiday season! When you’re bogged down making an entire Thanksgiving spread, easy desserts are a huge reprieve.
And this apple pear crisp is about as easy as it comes! The whole dessert takes just 10 minutes to assemble, and all you have to do is mix up the crisp topping and toss the fruit with sugar and spices and bake. It’s that simple!
Even better, this is a great recipe to prep for a crowd, and you can even double the recipe and bake it in a 9×13-inch pan to serve a whole host of people.
If you’re looking for a fast and delicious dessert to add to your Thanksgiving table, keep reading!


Key Ingredients (+ Substitutions)
Jenny’s Tip: Look for pears that are ripe and sweet, but not overly ripe or too soft. The pears will break down and soften in the oven, and you don’t want them to turn to total mush.
- Apples. Make sure that the apples have plenty of flavor and a firm texture. Skip the Red and Golden delicious, and opt for Granny Smith, Pink Lady, Fuji, Gala, or Honeycrisp (what I used!) depending on your preferences.
- Pears. I have tested this recipe with a variety of different pears, and my favorite (by far) are fresh Bartlett pears. I also think they have the best “pear” flavor that really comes through when baked. the Bosc pears I tested had little to no flavor, so I don’t recommend that variety.
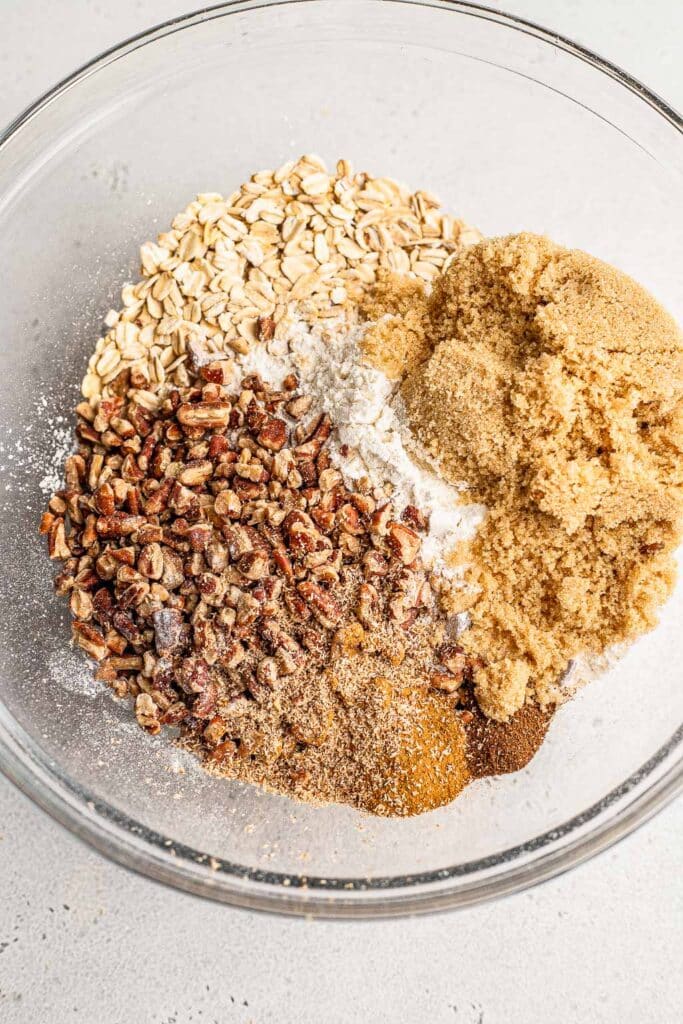
- Oats. Old fashioned oats give the crisp topping lots of texture. You could use instant oats if that’s all you have, but don’t use steel cut.
- Pecans. I love some chopped pecans in the crisp topping. If you don’t like pecans, you can omit them or swap in another nut like walnuts, almonds, or even cashews.
- Butter. Butter gives our crisp topping great flavor. I love using salted butter to balance out the sweet, but you can use unsalted butter as well.
- Brown sugar. Light or dark, it’s up to you!
- Maple syrup. A touch of pure maple syrup really enhances the flavor. My favorite is the bourbon barrel aged maple syrup from Trader Joe’s!
- Flour. Just use all-purpose flour here. If you’re looking to make this recipe gluten-free, you can swap in oat flour.
- Spices. Cinnamon, cloves, and nutmeg make the crisp topping perfectly spiced. You could swap in some pumpkin pie spice if that’s what you have.
- Cornstarch. Cornstarch will thicken the filling and is gluten-free.
Tools Needed
How to Make Apple Pear Crisp
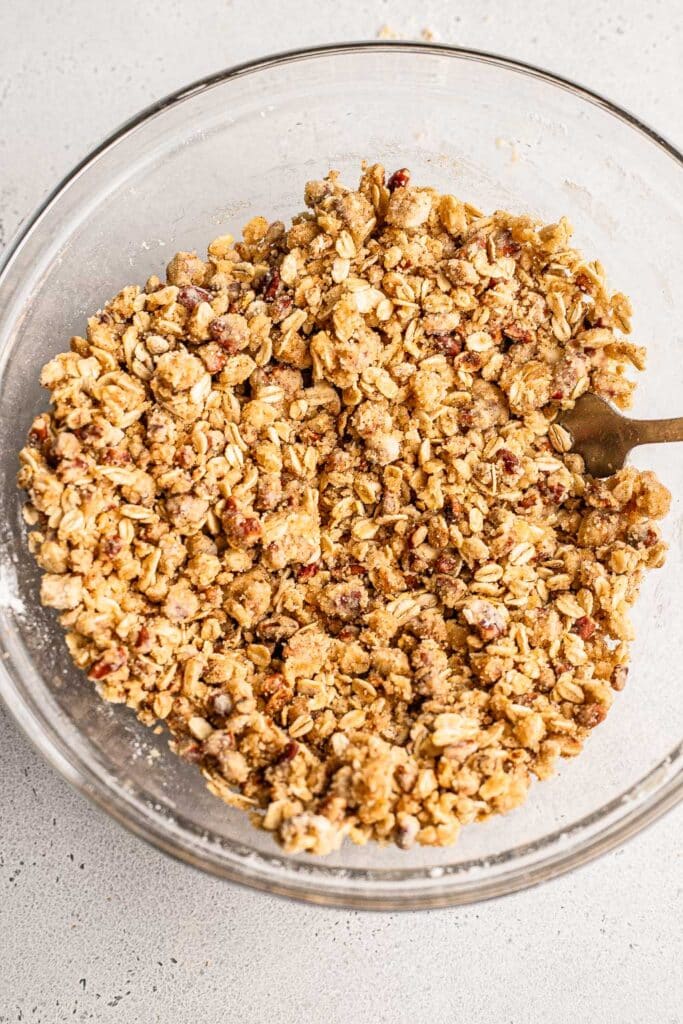
- Make the topping. I always make the topping first so that I can chill it in the fridge while I work on the filling.
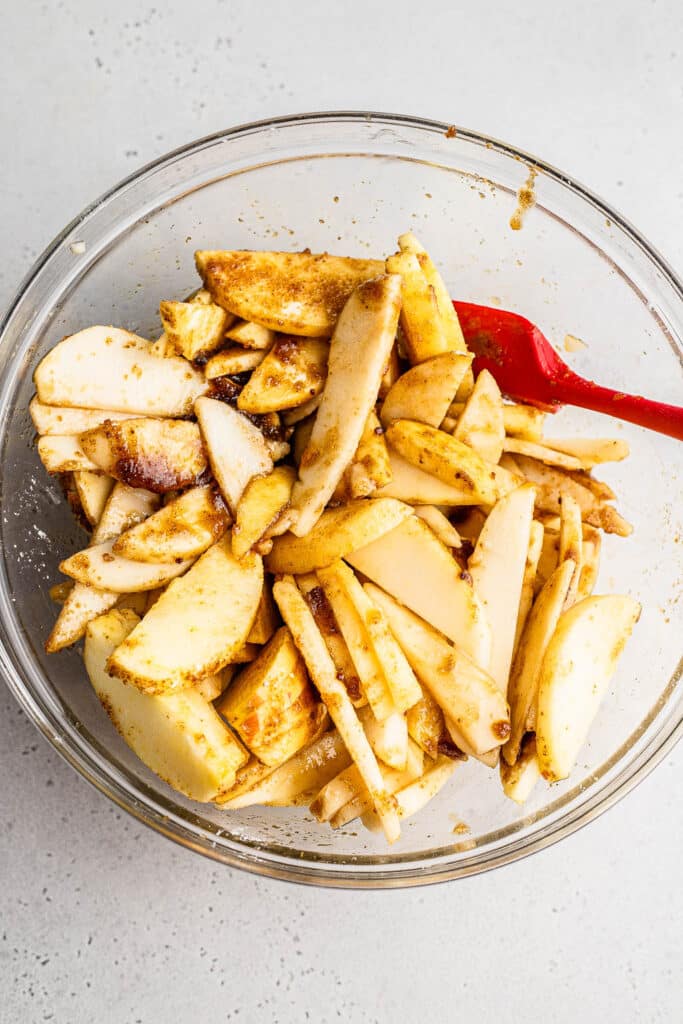
- Peel and slice the fruit. Peel the apples and pears and slice them into thick-ish slices, somewhere between 1/4″ and 1/2″.
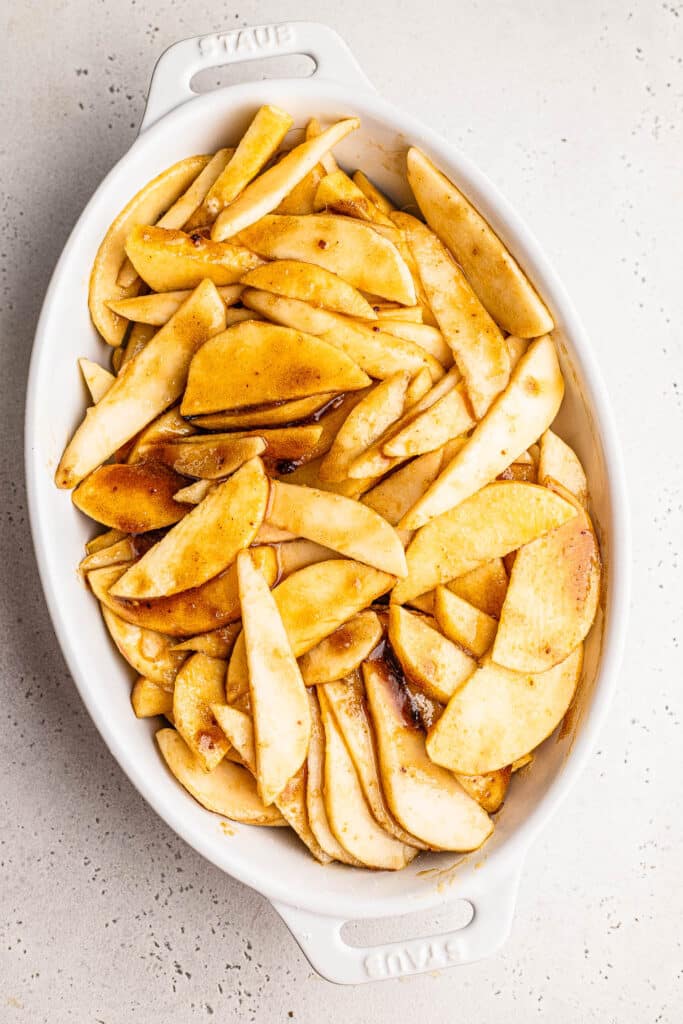
- Make the filling. Toss the sliced apples and pears with the filling ingredients until the cornstarch is well mixed in. Spread the filling evenly in a greased 2 qt baking dish.
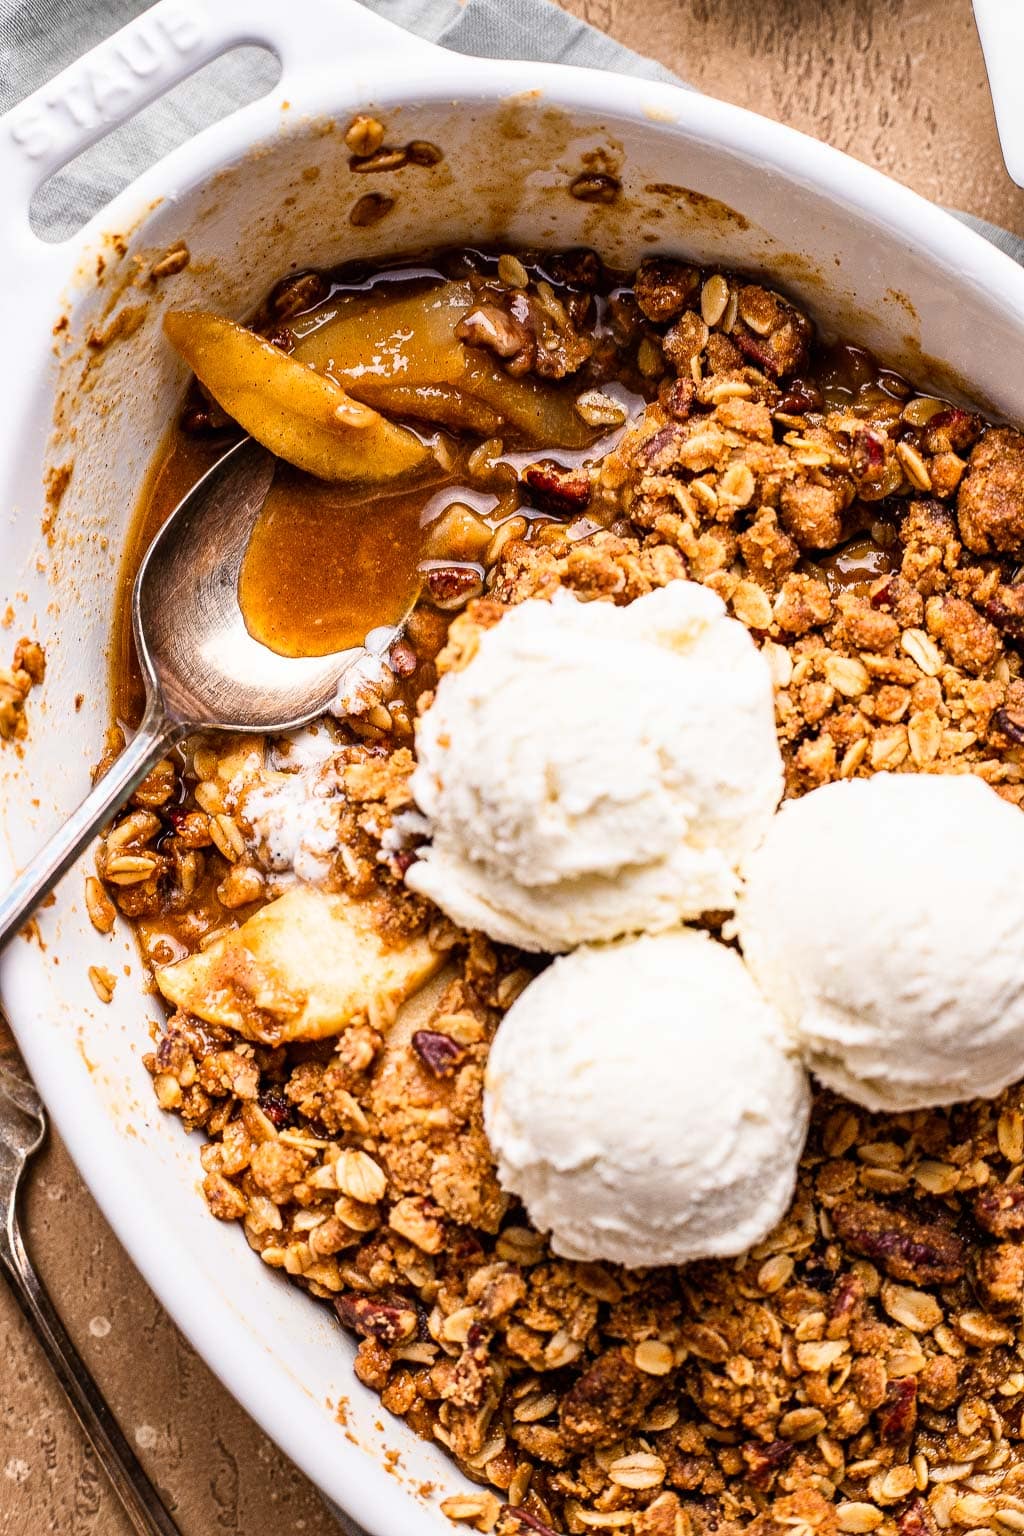
- Top and bake. Sprinkle the crisp topping evenly over the fruit filling, then bake until the top is golden brown and you can see the filling bubbling around the edges of the pan.

Jenny’s Tips for Making This Recipe
Don’t slice the apples or pears too thin. They will break down as they bake, so you don’t want them to completely disintegrate in the oven. Some visible slices in your filling are ideal.
Before baking, dot the top with pieces of butter. Yes, there’s butter in the crisp, but adding a little more to the top makes the topping so good with no dry parts.
Bake fruit crisps uncovered. This ensures a perfectly crispy topping every time.
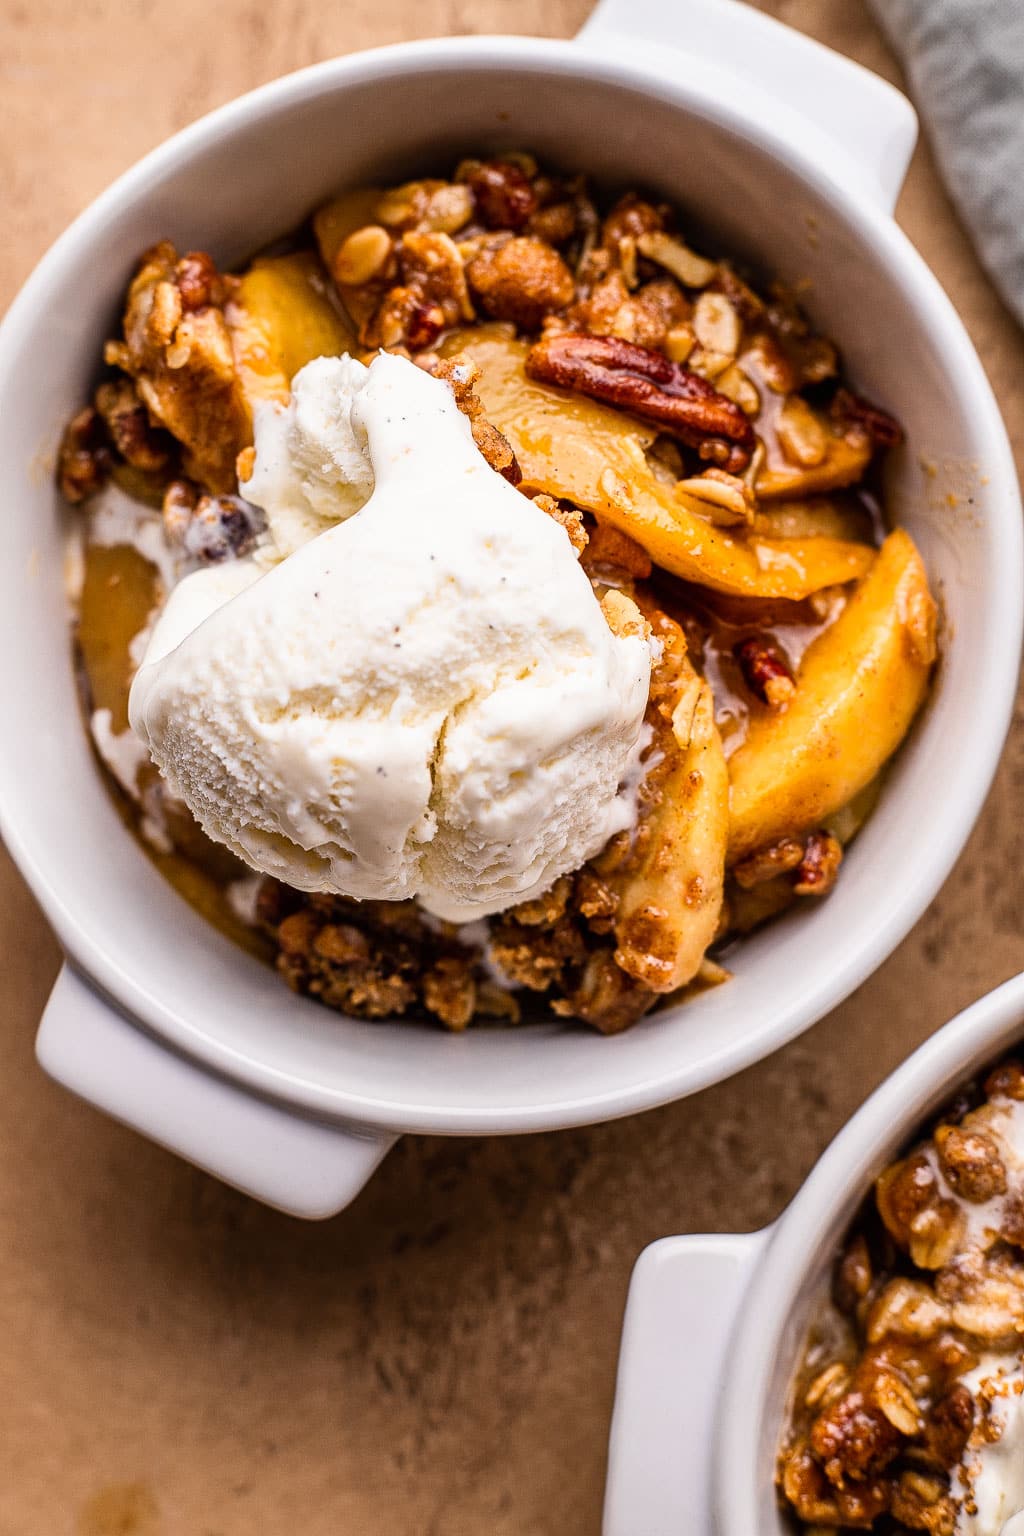
Enjoy warm or room temperature! Top with a scoop of vanilla ice cream and a drizzle of caramel sauce for an extra delicious dessert.
Make-Ahead Instructions
Good news! You can make this apple and pear crisp up to 2 days in advance, which is perfect for holiday dinners or entertaining.
To do so, bake the crisp according to recipe instructions. Allow to cool completely, cover, and refrigerate. Re-warm in the oven, covered with foil at 350ºF for 20 minutes, then uncover for 10 more.
Note that if you plan to enjoy the crisp on the same day that it is baked, then you do not need to refrigerate it before serving. If you don’t plan to serve the crisp on the same day as baking, then the dessert needs to be refrigerated overnight.
If you do give this recipe a try, I love hearing about it! Leave a comment with a star rating below. Be sure to subscribe to my weekly newsletter and never miss a new recipe! You can also snap a photo & tag @JENNYGOYCOCHEA on Instagram.
More Easy Fall Desserts to Make
- Apple Cider Donut Cake
- Skillet Apple Pecan Crisp
- Puff Pastry Apple Strudel
- Apple Crumb Cake
- Apple Cheesecake Bars
This post contains affiliate links from which I receive a small commission at no additional cost to you. Affiliate links allow me to keep providing great recipes for free and I never recommend products that I don’t love and personally own.

Apple Pear Crisp Recipe
Ingredients
Crisp Topping
- 2/3 cup all-purpose flour
- 3/4 cup old fashioned oats
- 1/2 cup brown sugar
- 1/2 cup chopped pecan pieces
- 1/4 teaspoon fine sea salt
- 1 teaspoon ground cinnamon
- 1/4 teaspoon ground cloves
- 1/4 teaspoon freshly grated nutmeg
- 8 tablespoons (1 stick, 4 oz) salted butter , divided
Apple Pear Filling
- 2 large Honeycrisp apples , peeled and sliced
- 3 Bartlett pears , peeled and sliced (choose ones that are ripe but firm)
- 1/2 cup brown sugar
- 3 tablespoons pure maple syrup
- 1 teaspoon vanilla bean paste (or vanilla extract)
- 1/4 teaspoon ground cinnamon
- 1 1/2 tablespoons cornstarch
- 1/4 teaspoon fine sea salt
Instructions
Crisp Topping
- Melt 6 tablespoons of the butter in a small dish in the microwave and then cool slightly. Dice the other 2 tablespoons into small pieces.
- In a small mixing bowl, mix the flour, oats, sugar, pecans, spices, and salt. Drizzle in the melted butter and mix with a fork until clumps form. Transfer the crisp topping to the fridge while you make the filling.
Apple Pear Filling
- Preheat an oven to 350 F. Lightly butter or grease a 2 qt baking dish.
- In a large mixing bowl, mix the apples and pears with the sugar, maple syrup, salt, vanilla, cinnamon, and corn starch. Toss everything together until well combined and the corn starch is evenly mixed.
- Spread the filling into the prepared baking dish in an even layer with any of the juices from the filling. Remove the topping from the fridge and evenly spread over the filling. Dot the top with the remaining diced butter.
- Bake for 50-60 minutes until the topping is golden brown and the filling is hot and bubbling. Remove from the oven and rest 20 minutes before serving.

Rate & Review This Recipe
This is sooo good! I made this for dessert and the apple cider braised pork for dinner and it was amazing!! I am a novice cook and I was able to execute this just fine. Just make sure you have a good peeler!