


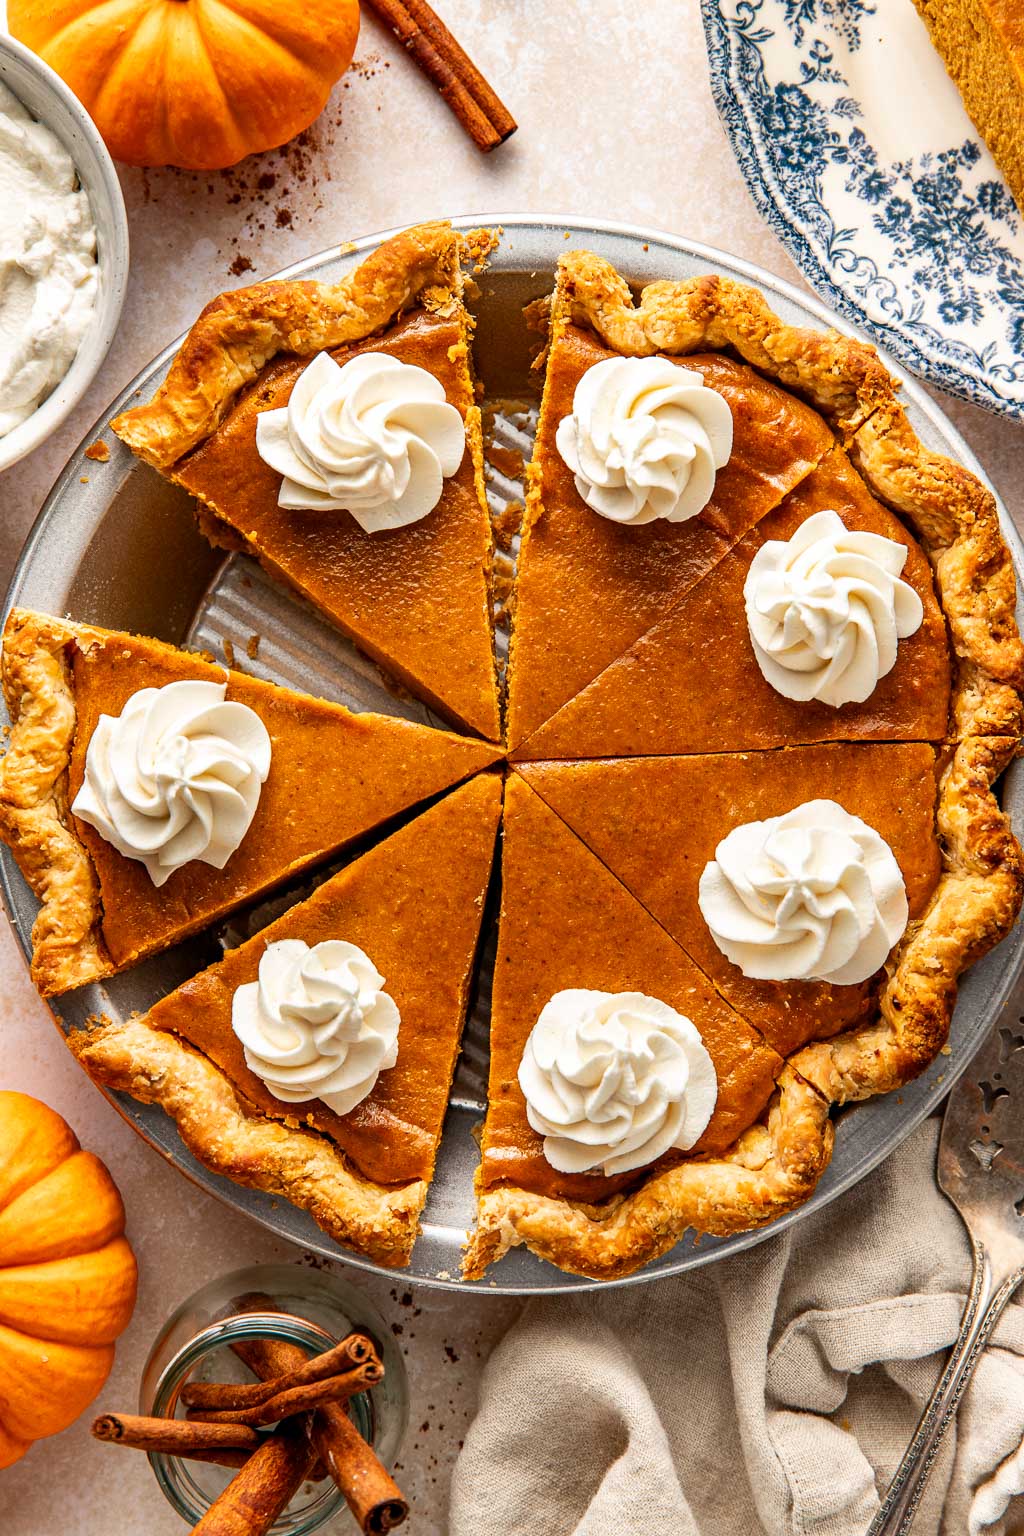
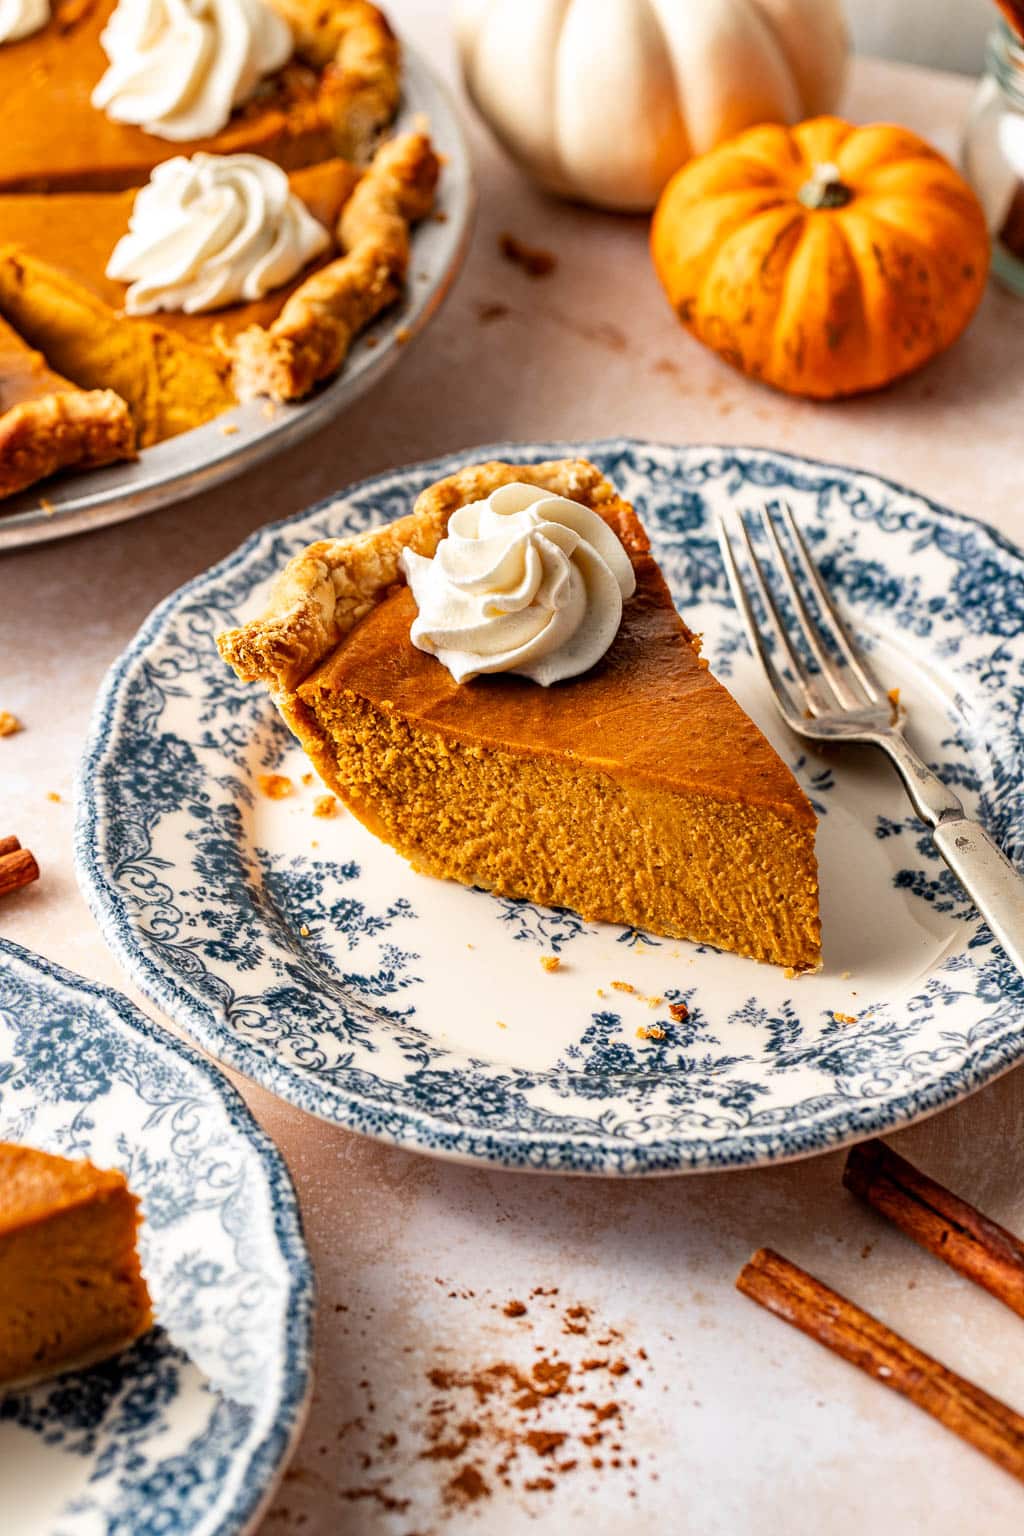
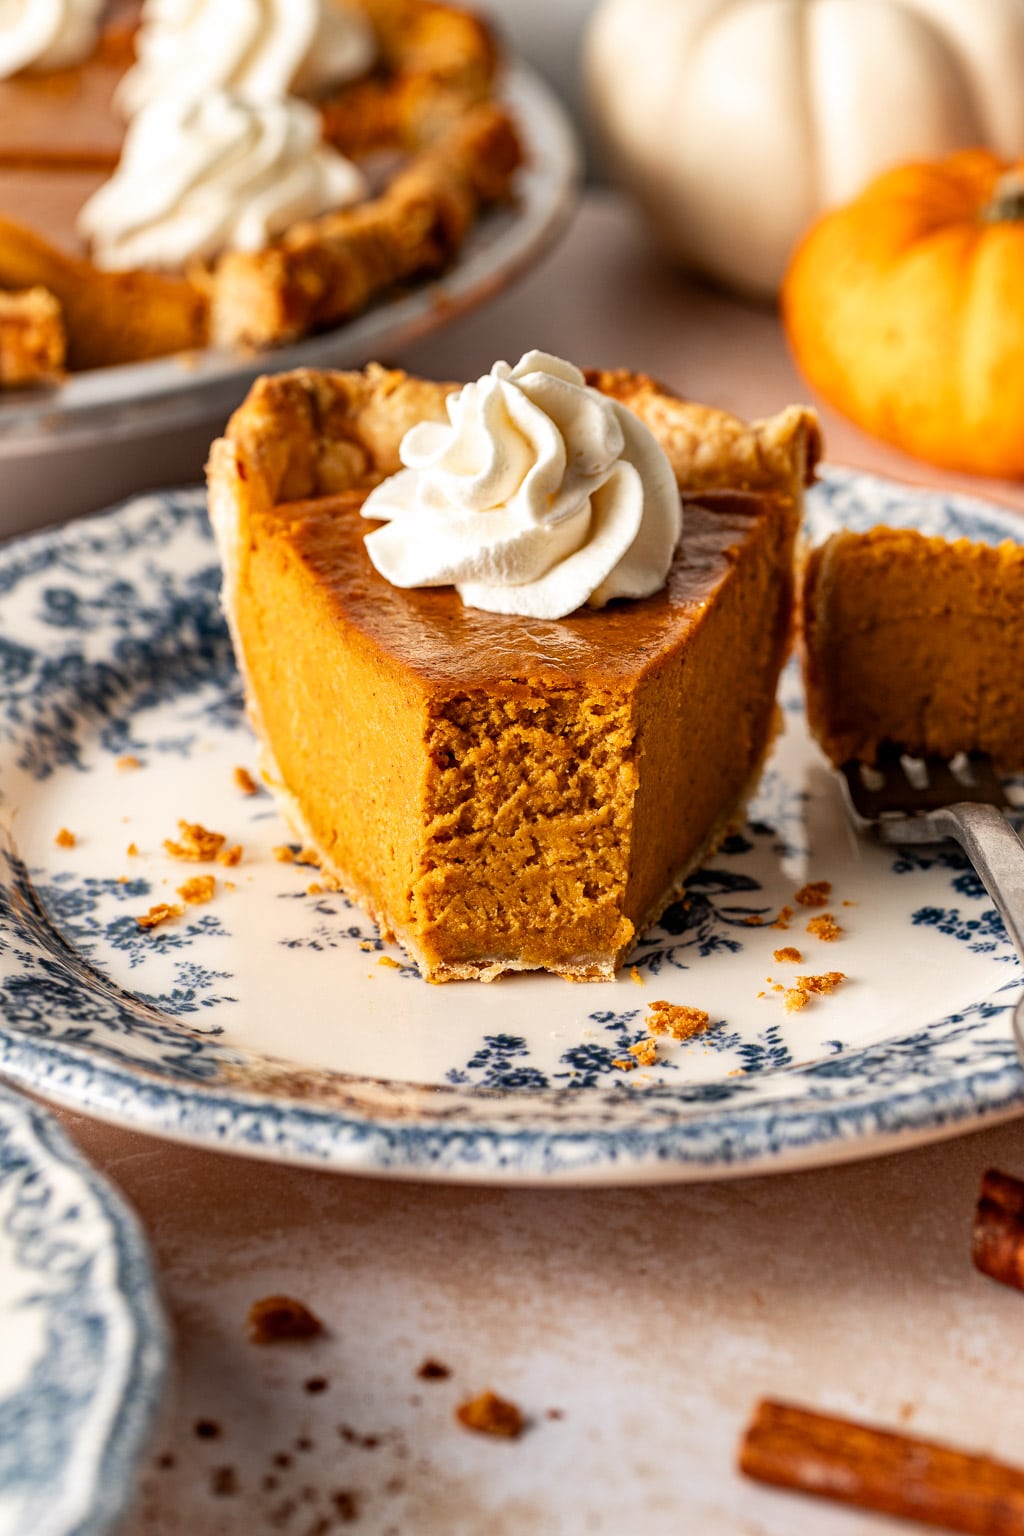
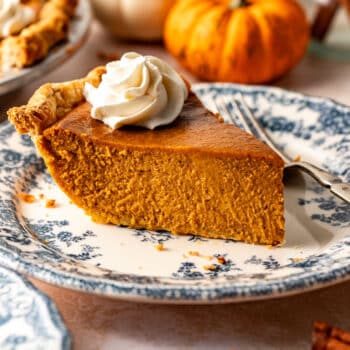
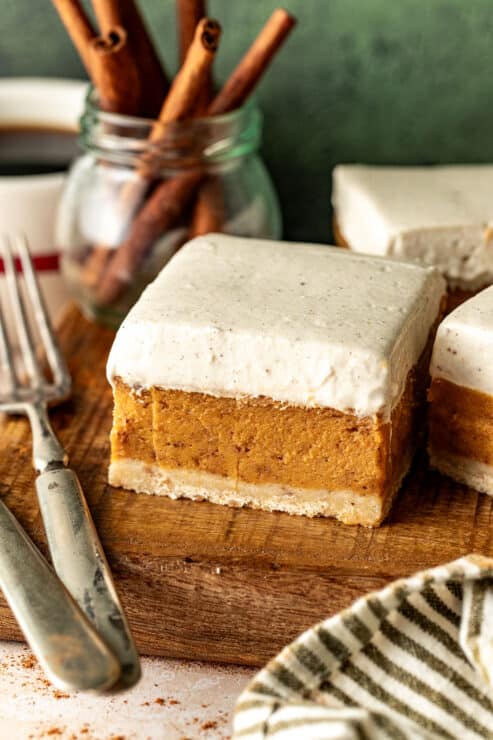
This is the best pumpkin pie recipe ever. A bold claim, perhaps, but I have spent months perfecting this recipe. What you get is a rich, silky smooth, from-scratch pumpkin filling that’s baked up in my all-butter pie crust for an incredibly delicious and complex pumpkin pie that will crush any store bought pie.
I use a special technique that really takes this pumpkin pie recipe over the top!
Table of Contents
What Makes this Pumpkin Pie So Good?
There are, decidedly, about a million pumpkin pie recipes out there. I really am fully aware of this, but in all my research looking at other recipes I found that they mostly follow the same recipe formula. Pumpkin puree, evaporated milk, sugar, eggs, spices–BORING. And sometimes watery and sad. If you’re a pumpkin pie hater, it might just be that you haven’t had the right pie yet.
I did a couple of special things to make this pie something special and I haven’t really come across anything similar. My first special technique is to use TWO cans of pumpkin puree. You spread all that puree out on a baking sheet and bake it for about 30 minutes. The goal here is to evaporate a lot of the water content from the pumpkin puree and it concentrates the flavor. The end result is almost the same weight as one can, but its really rich in flavor.
This recipe also uses toasted milk powder for depth of flavor and instead of using sugar, the pie gets its sweetness from sweetened condensed milk. The sweetened condensed milk melts into the filling and gives it incredible richness and flavor. The final key is just a bit of black pepper (freshly ground is a must!) which adds the perfect spice complement to the warm fall baking spices.
Jenny’s Tips for Perfect Pumpkin Pie Making
Use the right pie weights. Not all pie weights are created equally! While you can spend money on metal or ceramic weights, I find that small dried beans (like navy beans) work best or a combination of beans and rice. They’re cheap and can be used over and over again and do a great job of weighing the crust down as it blind bakes.
Use the right type of pie pan. Part of all the testing that went into my all-butter pie crust recipe was to test different types of pie pan to see which baked up best. By far and away, metal is the best and most consistent. Ceramic was the absolute worst and does not conduct heat evenly. Glass can get too hot too quickly and cause the butter to leak from the crust, so I recommend using a metal pie pan.
Use a food processor or blender. While you can use a mixing bowl and whisk, the best textural results come from blending the pie filling in a food processor or blender. This creates that silky smooth pumpkin pie filling that is to die for!
Helpful Cooking Tools
Key Recipe Ingredients
full list of ingredients, quantities & method in the recipe card at the end of the page.
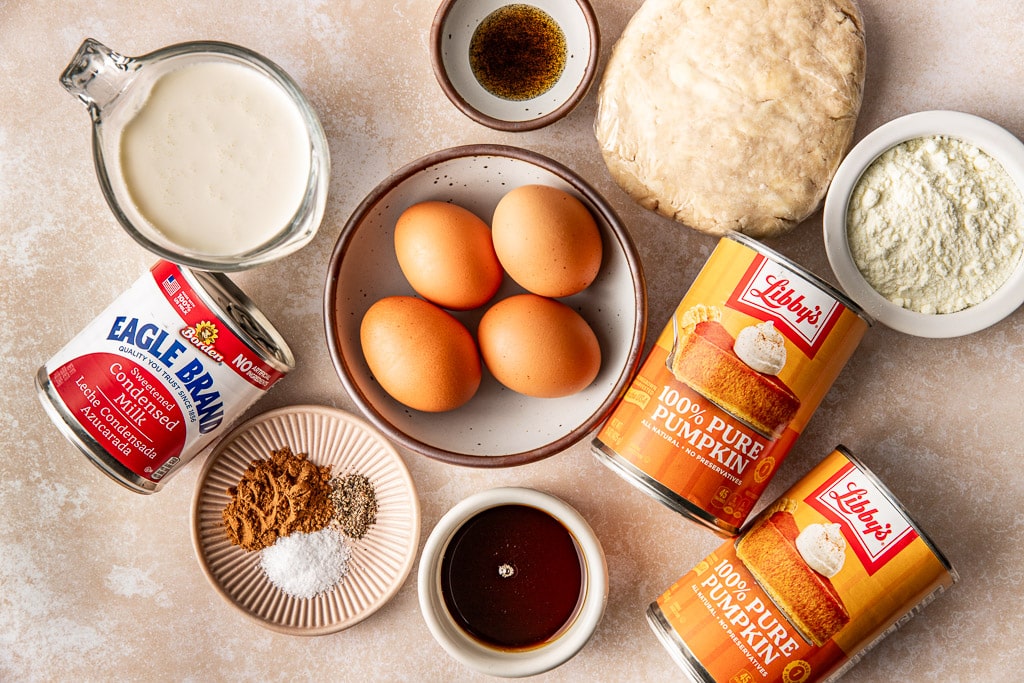
- Pie Crust. I am 100% team homemade all-butter pie crust! Yes, it’s more work but MY GOD it is so flaky and good. If you’re not confident in your crust making, you can use a single layer store bought pie crust.
- Pumpkin puree. Not all pumpkin purees are created equal! Some have higher water contents than others (some aren’t even made with pumpkin!). I prefer using Libby’s brand pumpkin puree and this isn’t sponsored!
- Sweetened Condensed Milk. Instead of using granulated or brown sugar, which won’t easily dissolve in the filling, my new secret weapon is swapping in sweetened condensed milk! It melts into the filling and adds so much richness and creates the smoothest filling.
- Maple syrup. Use pure maple syrup here, not pancake syrup.
- Heavy Cream. The cream adds richness and fat to the filling. This is a good thing! A lean pumpkin pie filling is what makes most pumpkin pies so sad.
- Eggs & Egg Yolks. By using a mix of whole eggs and yolks, you end up with a filling that’s almost custard-like and not too stiff.
- Whole Milk Powder. We toast the milk powder til it’s golden brown and it adds incredible depth of flavor in the same way that brown butter would.
- Spices. Pumpkin pie spice and a hint of black pepper are the perfect pairing.
- Vanilla bean paste. You could swap in extra vanilla extract but vanilla bean paste is readily available and adds a richer vanilla flavor.
Step-by-Step Instructions for Making Pumpkin Pie

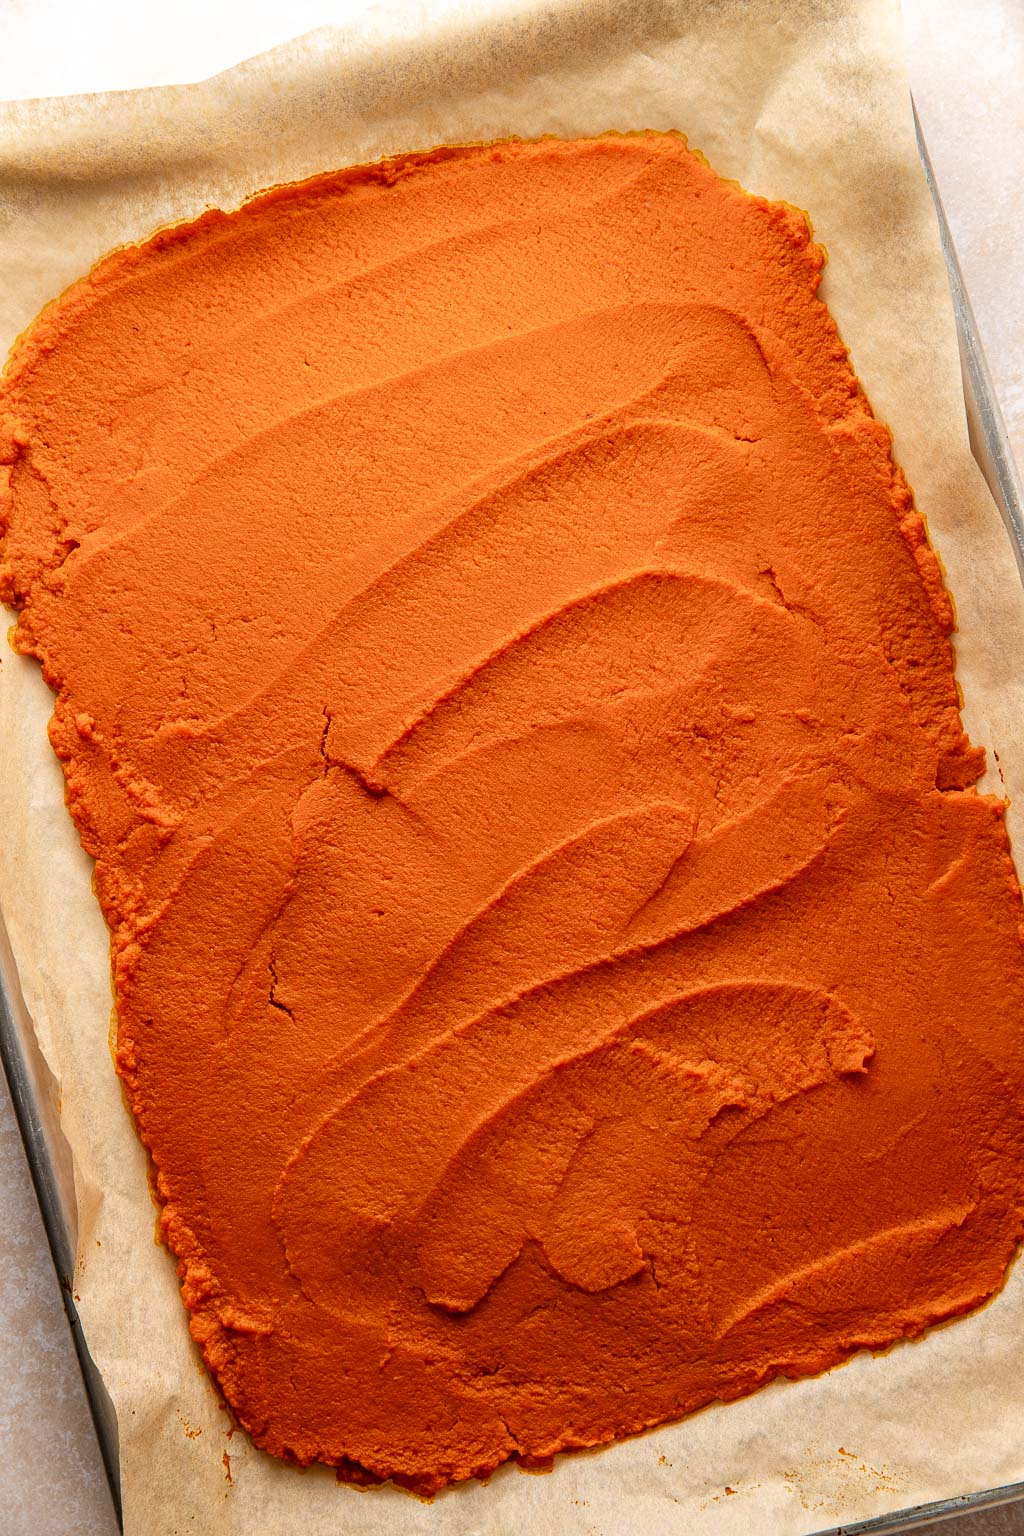
- Bake the pumpkin puree. The goal here is to bake out a lot of the water which makes pumpkin pie filling watery. It will also concentrate the flavor and it’s definitely a step you cannot skip. However, it can be done up to 3 days in advance and stored in the fridge!
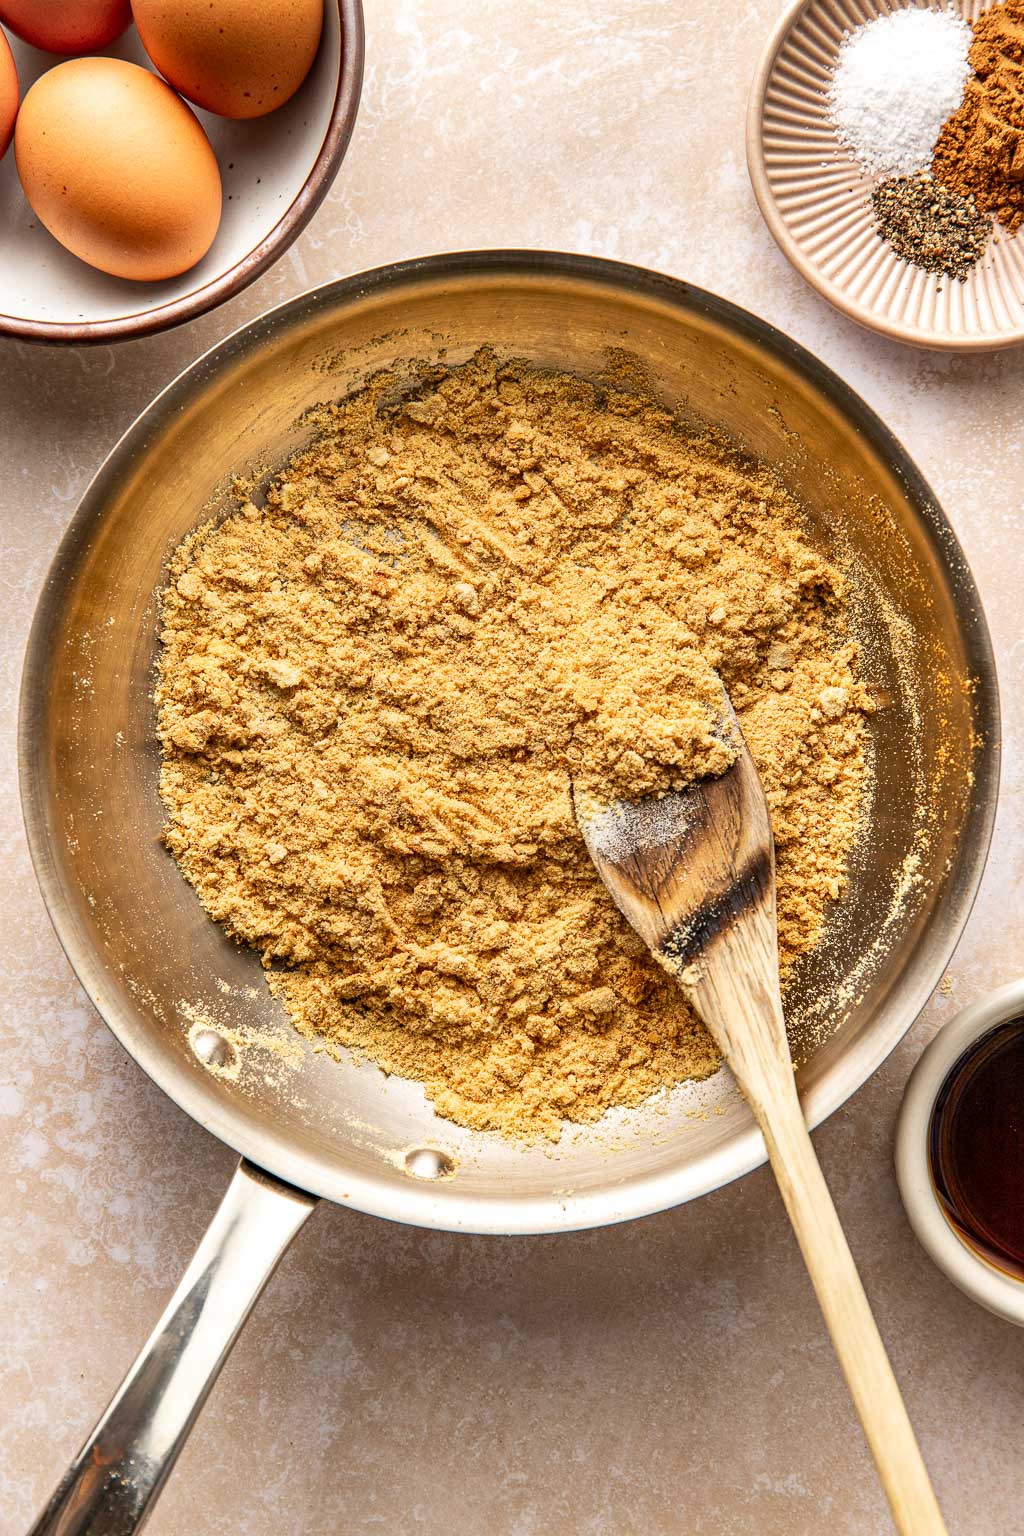
- Brown the milk powder. This is so easy to do and adds the flavor of brown butter to the pumpkin pie. You could skip this step if absolutely necessary and just add the milk powder.
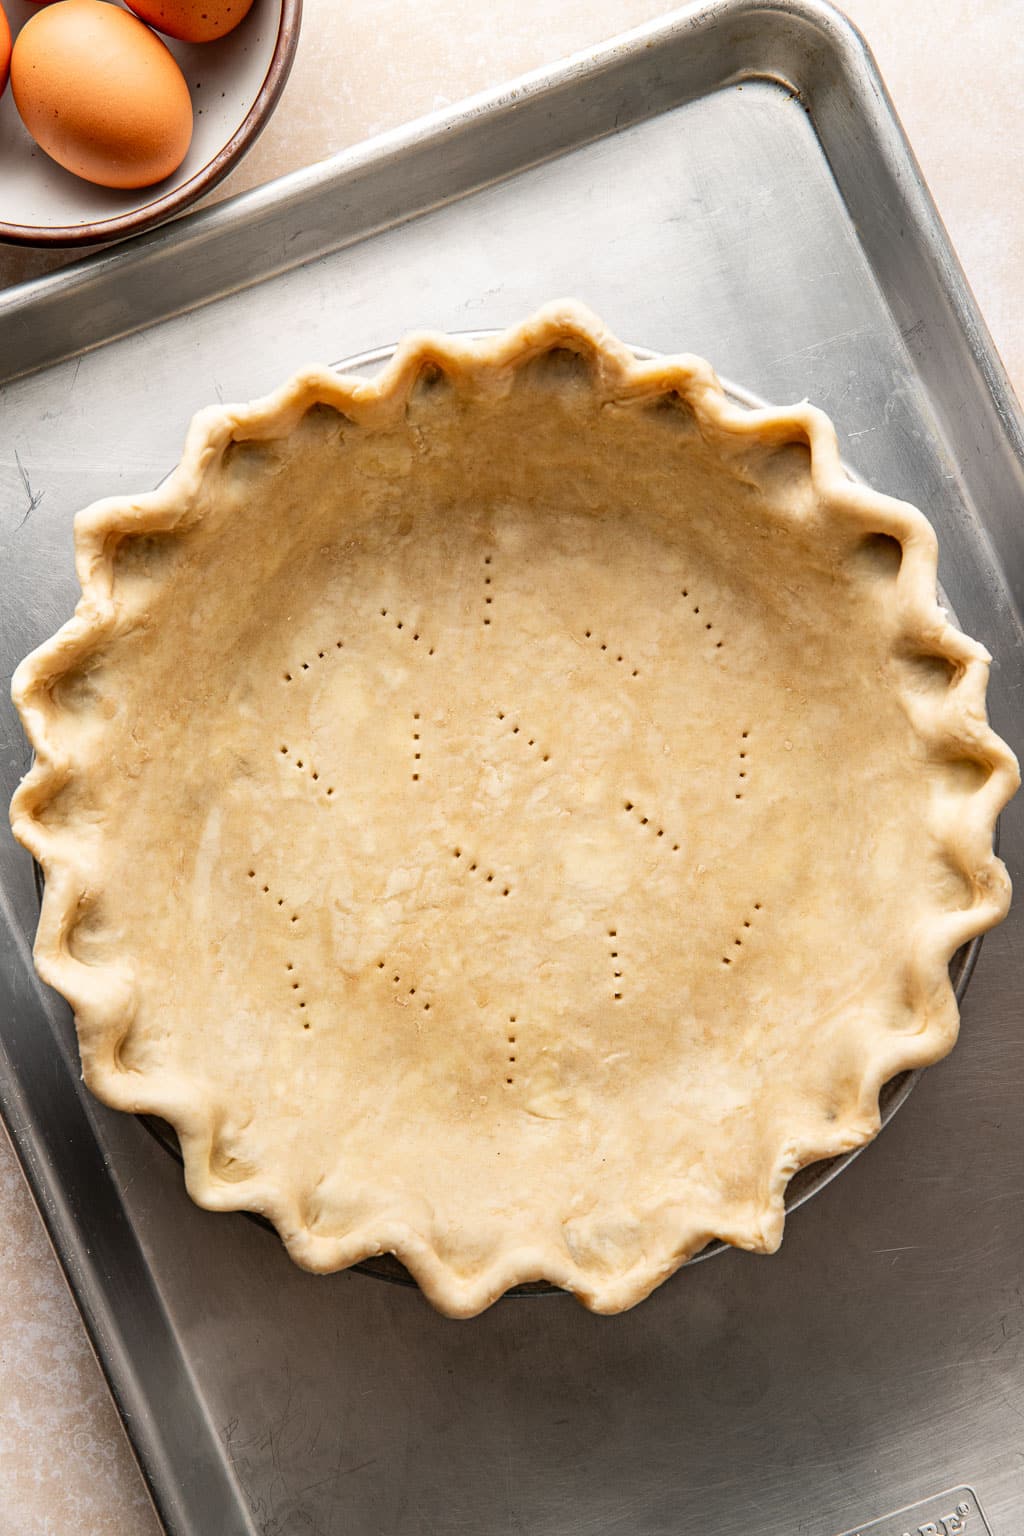
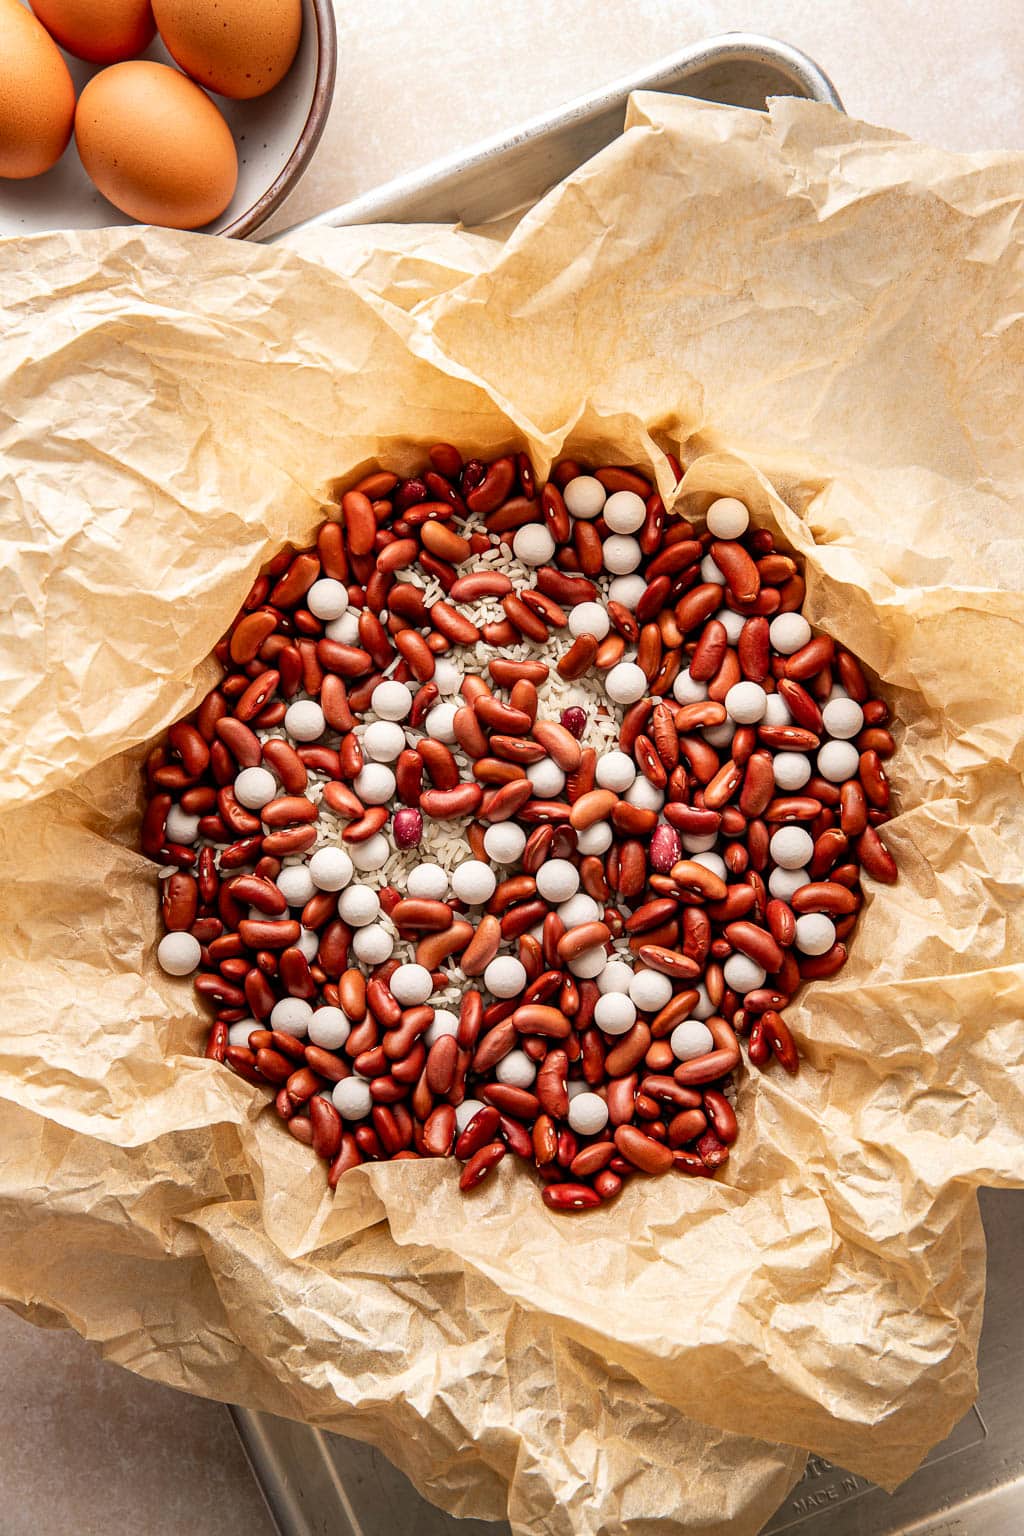
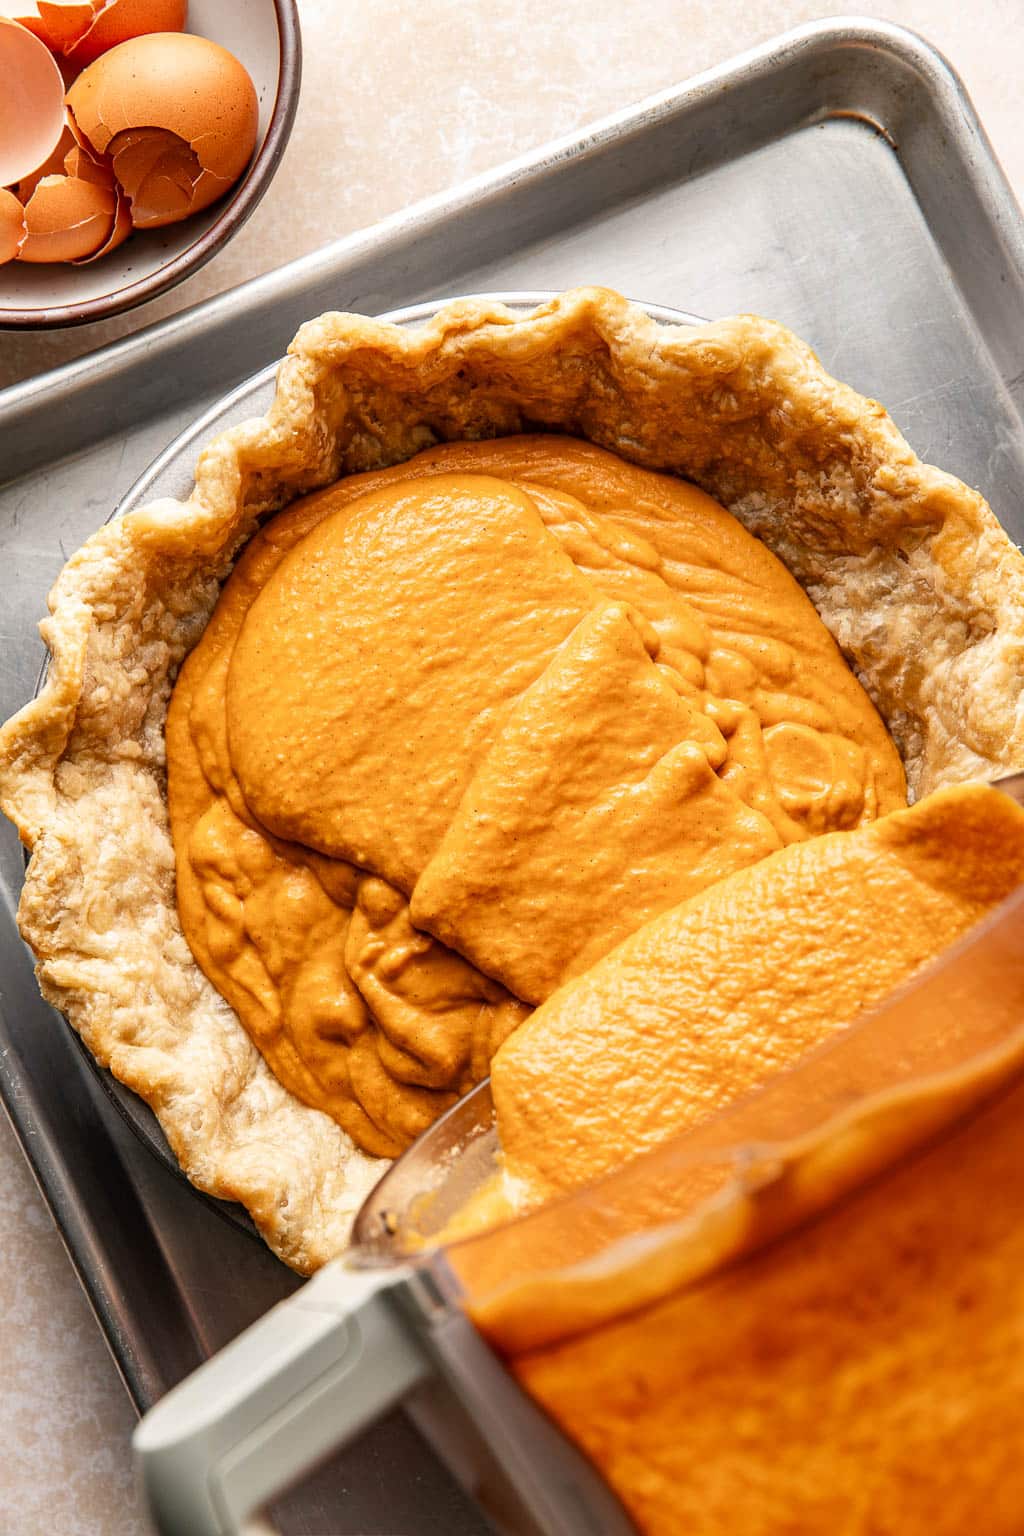
- Blind bake the crust. We are team “NO SOGGY PIE BOTTOMS” in this house and so I always partially blind bake my crust. You will line the docked crust with parchment and fill it with pie weights or a combination of small-format dried beans. Bake for 15 minutes, remove the weights, and bake for another 5. This gives your crust a head-start and makes it super flaky without ever getting soggy.
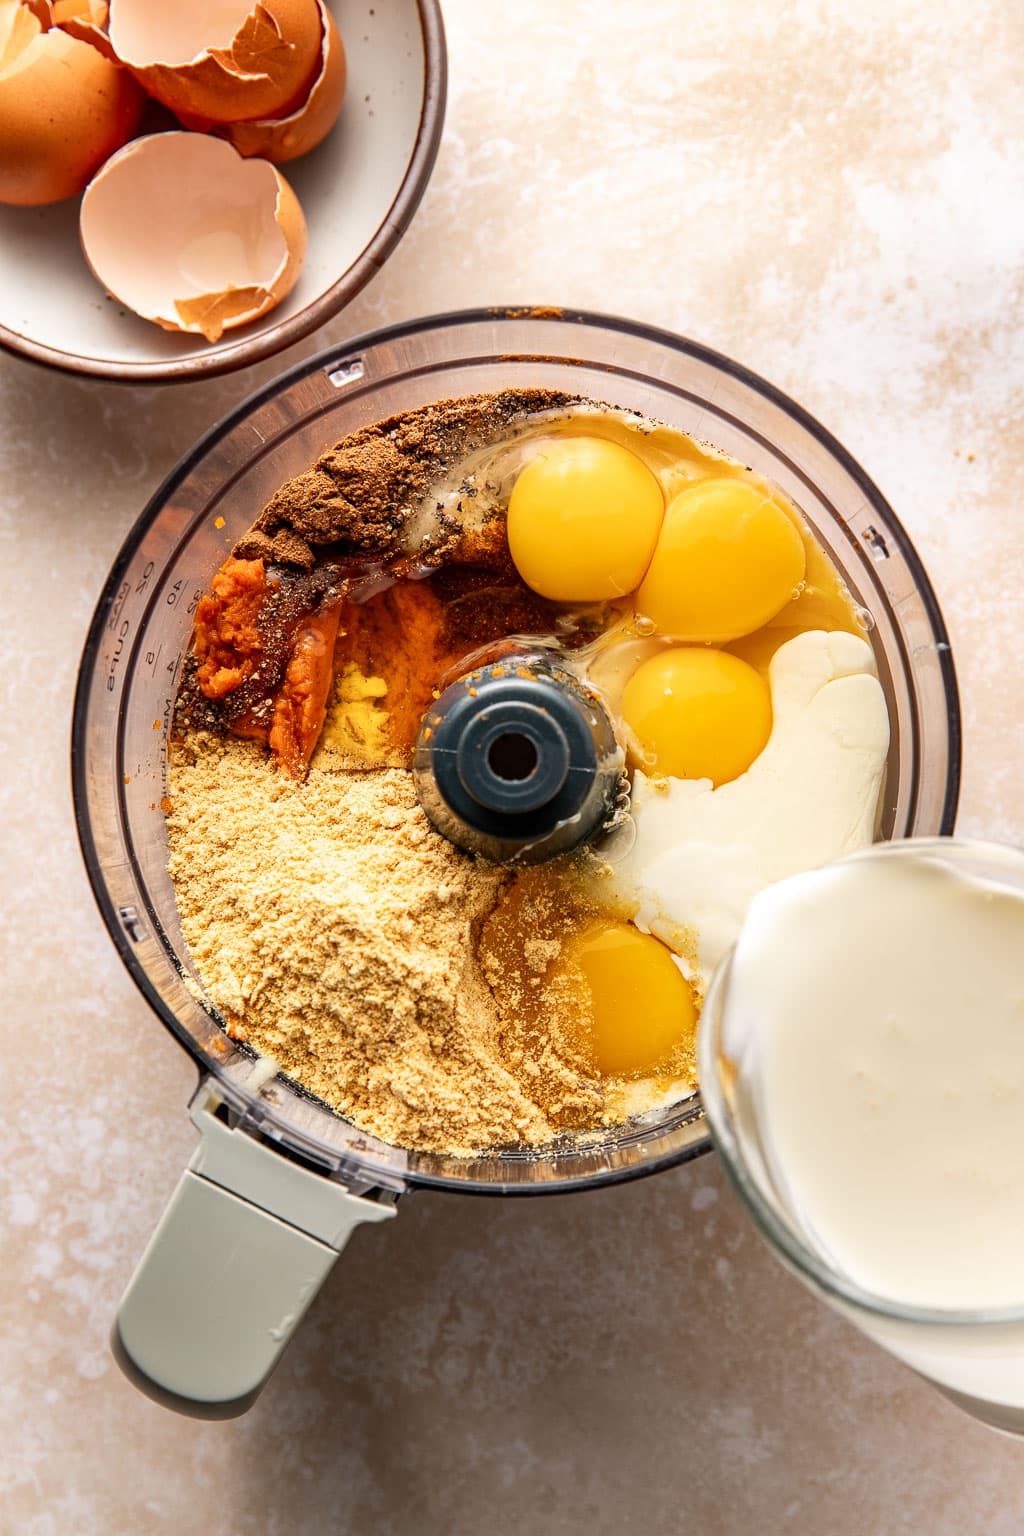
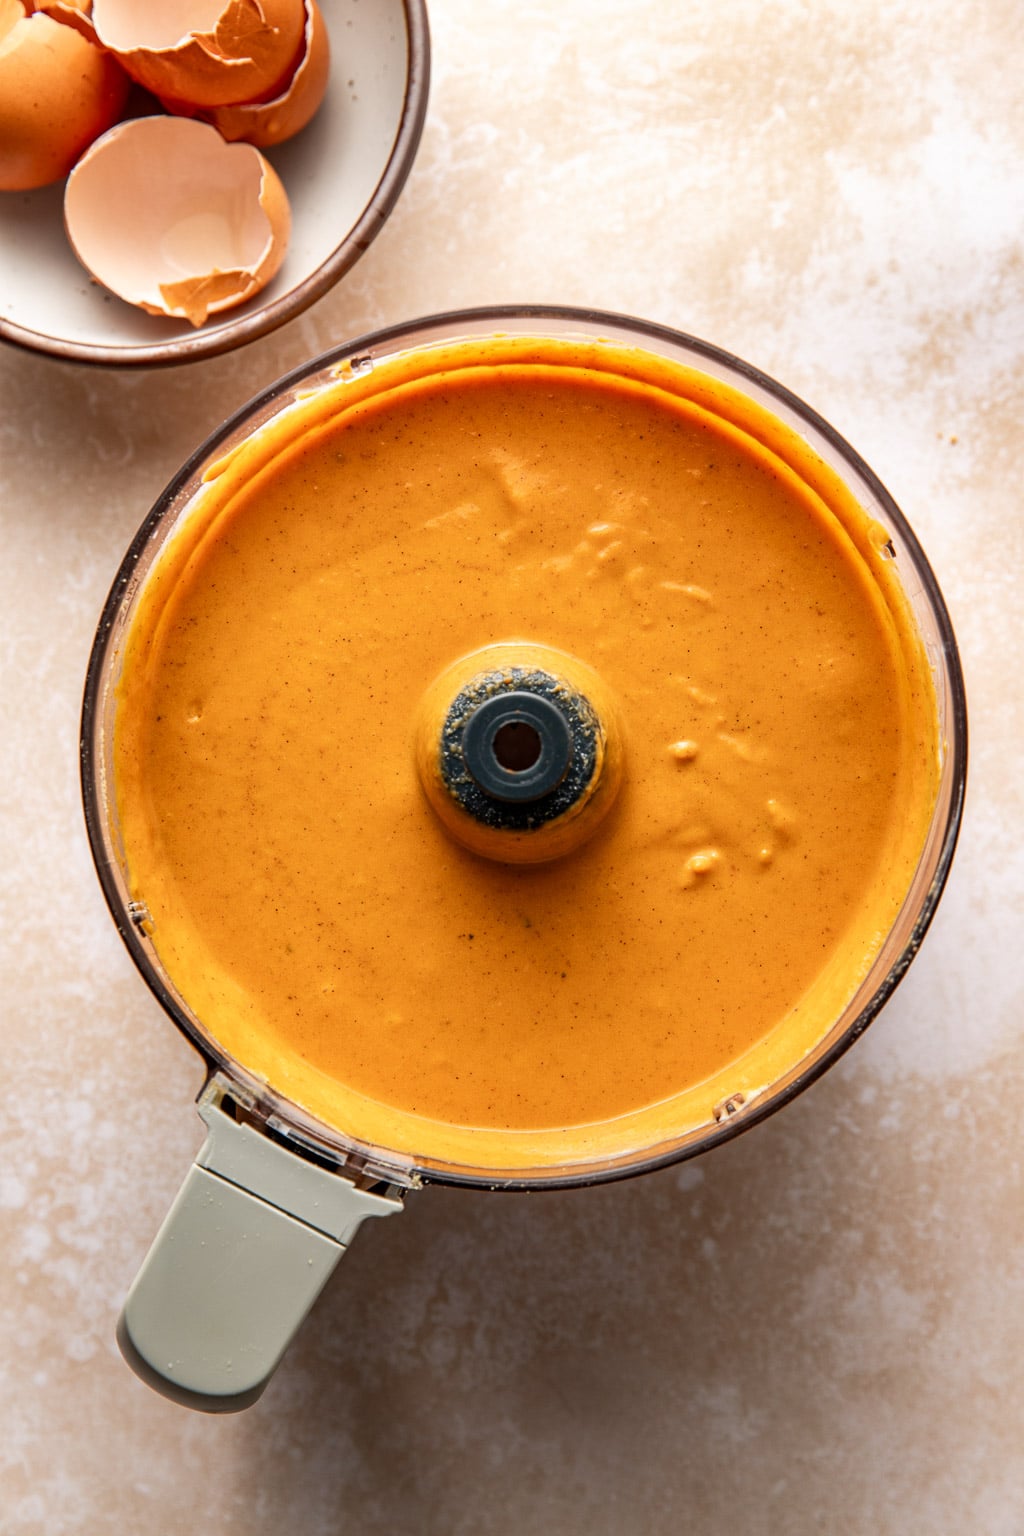
- Make the filling. The easy part is you add all the filling ingredients to a food processor and blend until it’s silky smooth. You can do this in a mixing bowl, but the filling won’t be as smooth.
- Bake the pumpkin pie. The trick here is to bake the pumpkin pie until it’s set, but the center jiggles a little. This keeps the filling extremely silky and creamy. Resist the urge to over-bake! If you’re concerned, the internal filling temperature should read about 175°F on an instant read thermometer.
Make Ahead Instructions
Pie making is inherently somewhat labor intensive, but to make the work easier you can definitely break up the steps of making pumpkin pie into several stages.
Crust: You can make the crust up to 2 days in advance and store it in the fridge. You can also make and freeze the crust up to 1 month in advance. Just let the crust defrost overnight in the fridge.
Pumpkin puree: This is such a crucial part of the recipe and a step that must be followed, otherwise you will have a massive amount of watery filling. You can bake and store the pumpkin puree in the fridge for up to 3 days.
Browned milk powder. This has all the flavor of brown butter and adds a ton of depth of flavor to the pumpkin pie. You can brown the milk powder, let it cool, and store it in an airtight container at room temperature for up to 1 day.
Whole pie: You can also completely assemble and bake the pumpkin pie 2-3 days ahead of time! Wrap it well with plastic wrap when it’s totally cool and store it in the fridge. You can serve the pie chilled or bring it up to room temperature before serving.
If you do give this recipe a try, I love hearing about it! Leave a comment with a star rating below. Be sure to subscribe to my weekly newsletter and never miss a new recipe! You can also snap a photo & tag @JENNYGOYCOCHEA on Instagram.
More Delicious Pie Recipes
Coconut Key Lime Pie
Jack-o-Lantern Hand Pies
Salted Chocolate Pecan Pie
Classic Quiche Lorraine
Maple Bourbon Pecan Pie
This post contains affiliate links from which I receive a small commission at no additional cost to you. As an Amazon Associate, I earn from qualifying purchases. Affiliate links allow me to keep providing great recipes for free and I never recommend products that I don’t love and personally own.
Best Ever Pumpkin Pie Recipe
Ingredients
- 1 recipe all-butter pie crust (or store bought single layer pie crust)
- 2 – 15 oz cans pumpkin puree
- 1/4 cup whole milk powder
- 14 oz can sweetened condensed milk
- 1/4 cup pure maple syrup
- 1 cup heavy cream, room temperature
- 2 eggs, room temperature
- 2 egg yolks, room temperature
- 1 teaspoon vanilla bean paste
- 1/2 teaspoon kosher salt
- 1 1/2 teaspoons pumpkin pie spice
- 1/8 teaspoon freshly ground black pepper
Instructions
- Bake the pumpkin puree. Preheat an oven to 325 F. Line a rimmed baking sheet with parchment paper and spread the pumpkin puree in an even layer over the parchment paper, leaving an inch border or so around all sides. Bake for 35-40 minutes, until the puree is darker in color and somewhat dry to the touch. It should weigh about 500 g (please do consider weighing it!). Remove it from the oven and let it cool completely. This step can be done up to 3 days in advance and stored in an airtight container in the fridge. Just bring it up to room temperature before using.
- Brown the milk powder. Add the milk powder to a dry skillet over medium-low heat. Cook, stirring occasionally, until golden brown. Remove from the heat and transfer the milk powder to a small bowl. This can be done 1 day in advance and stored in an airtight container at room temperature.
- Roll out the pie crust. Roll the pie dough out to between 1/4 and 1/8th inch into a large round on a lightly floured surface. You shouldn’t need much flour, if your dough is sticking, you likely added too much water. Lay the pie crust into a pie pan, pressing it into the pan, trim the excess, and crimp the edges if desired. Use a fork to dock the pie crust all over and transfer the dough-filled pie pan to the fridge for 30 minutes.
- Preheat an oven to 400 F.
- Partially blind bake the pie crust. Place the chilled pie pan and crust on a baking sheet. Line the pie crust with crumpled parchment paper or foil and fill with pie weights. Bake for 15 minutes, then gently remove the parchment and pie weights and bake 5 minutes more. Remove from the oven and let the pie crust cool slightly.
- Make the pumpkin pie filling. Combine the roasted pumpkin, toasted milk powder, sweetened condensed milk, maple syrup, eggs and yolks, spices, salt, and heavy cream in a food processor and process until the filling is smooth. You can use a whisk and mixing bowl, but the filling will not be as smooth. Don't be alarmed that this filling is thicker than most pumpkin pie fillings.
- Bake the pie. Spread the filling evenly in the pie crust and bake for 35-45 minutes, until golden and slightly puffed on the edges, but with a slight jiggle in the center. The internal temperature of the filling should read at least 175°F on an instant read thermometer. If the crust starts getting too dark, tent it with foil. Remove the pie from the oven and let it cool to room temperature before chilling or serving.


Rate & Review This Recipe
Why whole milk powder? I live in a small town and can only find low-fat powder. And it is taking forever for it to brown!
Low fat can still work just fine. The whole milk powder is just a bit richer. The browning should only take a couple of minutes in a dry skillet over medium low heat. You can increase the heat, just be sure to keep an eye on it so it doesn’t burn.
I love love love this recipe! Unlike most pumpkin pie recipes, this one has a nice thick layer of pumpkin (but it doesn’t take forever to bake!) Don’t skip roasting the pumpkin puree or toasting the milk powder…it really enhances the flavor and makes it taste more rich and cozy. I served this at Thanksgiving and everyone absolutely loved it. Very easy to make as well!
Thank you so much Meg! Always love hearing that the recipe was a hit—-thank you so much for including my recipe on your Thanksgiving table!