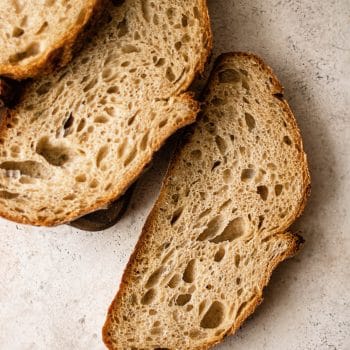
easy overnight sourdough bread
Prep Time: 4 hours
Cook Time: 45 minutes
Makes: 1 sourdough batard
Ingredients
- Levain
- 50 g active sourdough starter 100 percent hydration
- 25 g whole wheat or bread flour
- 25 g tepid water
- Dough
- all the levain from above
- 50 g whole wheat flour
- 450 g strong bread flour
- 375 g slightly warm water
- 10 g fine sea salt
Instructions
- To make the levain: Mix together the starter, flour and water in a small jar or container until a paste forms. Cover and allow to ripen at room temperature for 6-8 hours. Usually I do this in the evening so that I can bake the next morning. The levain will be very bubbly and will have doubled in size.
- In a large mixing bowl, mix together the levain, water and flours until a shaggy dough forms. Using your hands, continue to knead and pinch the dough until all the flour is incorporated. Cover and let the mixture sit for 1 hour. This is an important step as it allows the flour to be completely hydrated by the water, known as the autolyse.
- Sprinkle the salt over the top of the autolysed dough and use wet hands to incorporate the salt by gently kneading. Cover the dough and allow it to rest for 45 minutes.
- The next step is lamination and this is a totally optional step, but it adds tensile strength to our dough which is important for yielding a nice, open crumb and it's the perfect opportunity to add any mix-ins. Lightly spray your counter or a large cutting board or pastry board with water. Using a flexible scraper, scrape your dough into a mound in the middle of the area you've spritzed with water. Lightly wet your hands and stretch the dough on all sides into a large thin sheet. If the dough fights you, give it a minute, but it should stretch easily (see above video). Once the dough has been stretched thin into a large rectangle, sprinkle in any add ints (fresh herbs, seeds, seasoning, cheese, etc. just try not to add anything with too much moisture). Working from the bottom of the rectangle, fold 1/3 of the dough up to the middle and then fold the top third down (like a letter fold). Fold the dough over itself into a small square and place the dough into a lightly greased 6 qt cambro or bowl and cover with a lid or plastic wrap.
- Rather than kneading the dough, we are going to apply folds to the bread. To fold the dough, grab the dough at one side, lift it up, and fold it over on top of itself. Fold the dough four times, moving clockwise from the top of the bowl (or giving the bowl a quarter turn in between folds). Let the dough rest 30 minutes, then repeat. Do this a total of 3 times, every 45 minutes.
- Once you've finished the folds, cover and let the dough rise undisturbed in a room temperature location for about 2 hours. I like to mark the outside of the container with a piece of tape so I know how far the dough has risen, but you're looking for it to be puffy with visible bubbles.
- Line a bread proofing basket (I use a batard shape vs a circle), colander, or a clean mixing bowl with clean kitchen towels. Dust them heavily with flour, rubbing the flour into the cloth on the bottom and up the sides with your fingers. Use more flour than you think you'll need — it should form a thin layer over the surface of the towel. You can lightly spray the towel with water before dusting it with flour, it'll help the flour stick.
- Lightly dust your work surface with flour. Gently turn your dough out onto the counter. Gently stretch the dough into a small rectangle. Fold one short side over the other, and roll the dough up into a log (see above video) and pinch together the seam on the sides and top. Again, you don't want to deflate the gases you've built up in the dough, but you do want there to be tension across the top of the dough. Transfer the log to your prepared basket, seam side up. Gently knit the seam together a little tighter (see above video). Cover with plastic wrap and place in the fridge to slowly proof overnight.
- Preheat your oven to 475 degrees F. Place a dutch oven with a lid in the oven to preheat for 40 minutes. Remove dough from the fridge. Cut a piece of parchment paper to about 15x15" and dust with flour. Gently turn the dough onto the parchment square, seam side down. Score the top of the loaf, if desired. Remove the dutch oven from the oven, CAREFULLY, and remove the lid. Using the parchment paper, lower the loaf into the dutch oven and cover. Return the pot to the oven and bake for 25 minutes. Uncover, lower the temperature to 450 degrees F and bake for another 20 minutes, until the loaf is a deep golden brown color. Remove from the pot. Let the loaf cool for at least 2 hours before slicing. The bread can be wrapped tightly in plastic and frozen for 1 month.
Notes
You don't need to use whole wheat flour if you don't have any. Just adjust your bread flour to be 500 grams vs 450.
If you haven't used your starter in a bit, be sure to feed it for a day or two on the counter so that it becomes active before using it for baking.
This recipe can be very easily doubled to make two loaves.