
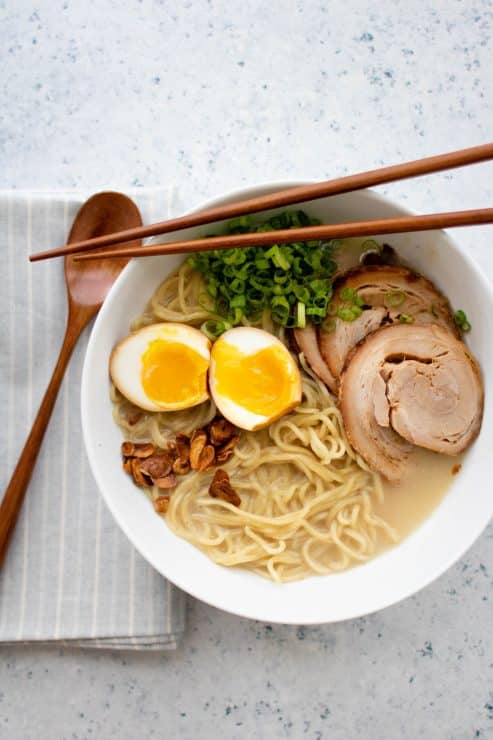
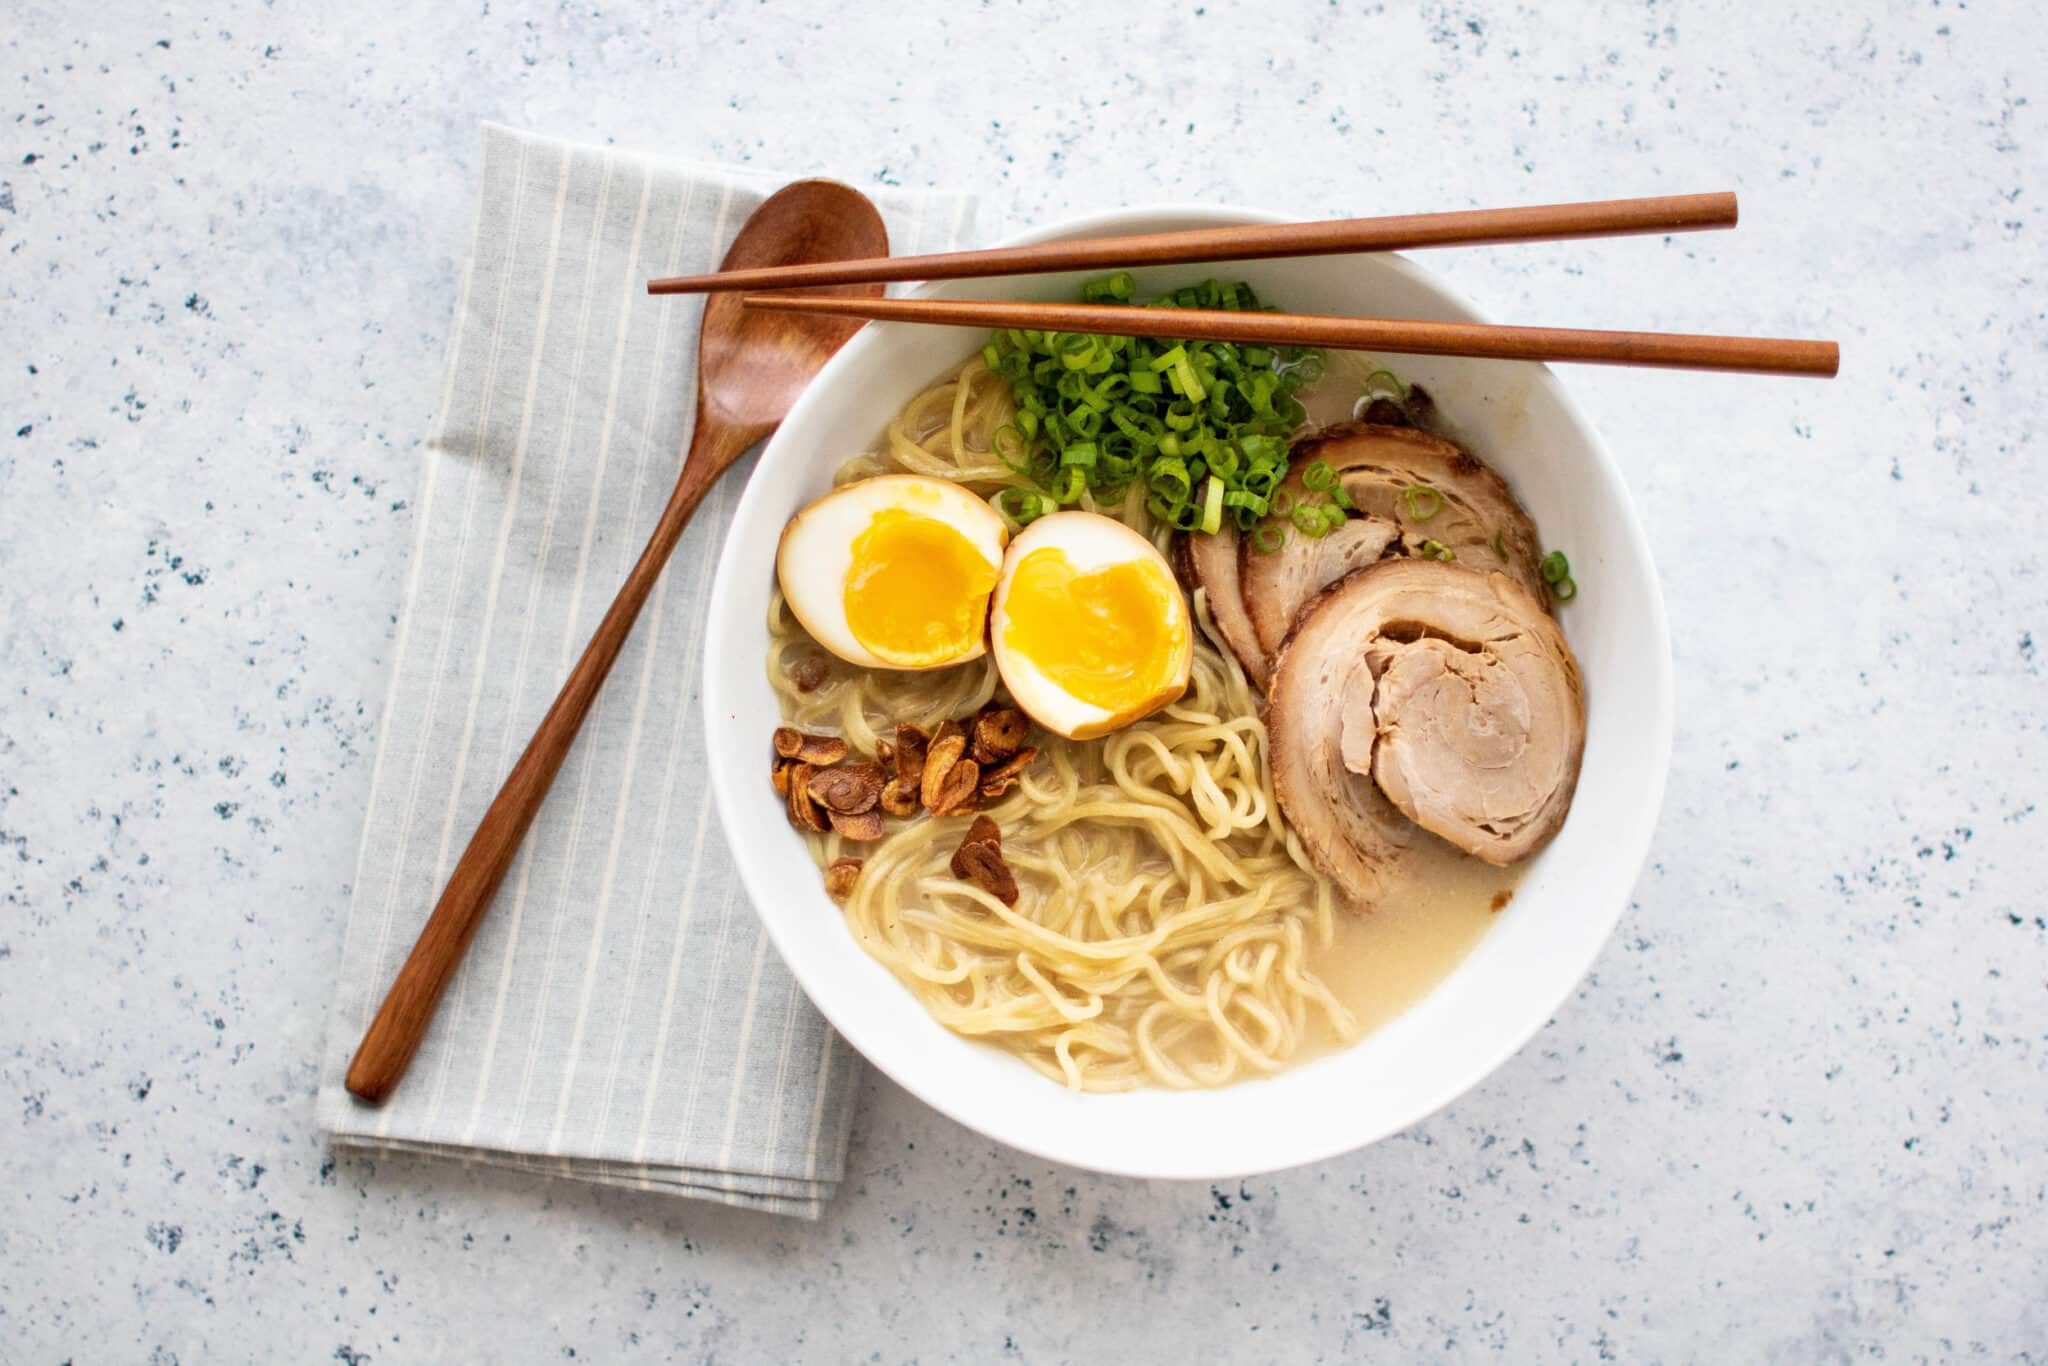
tonkotsu ramen

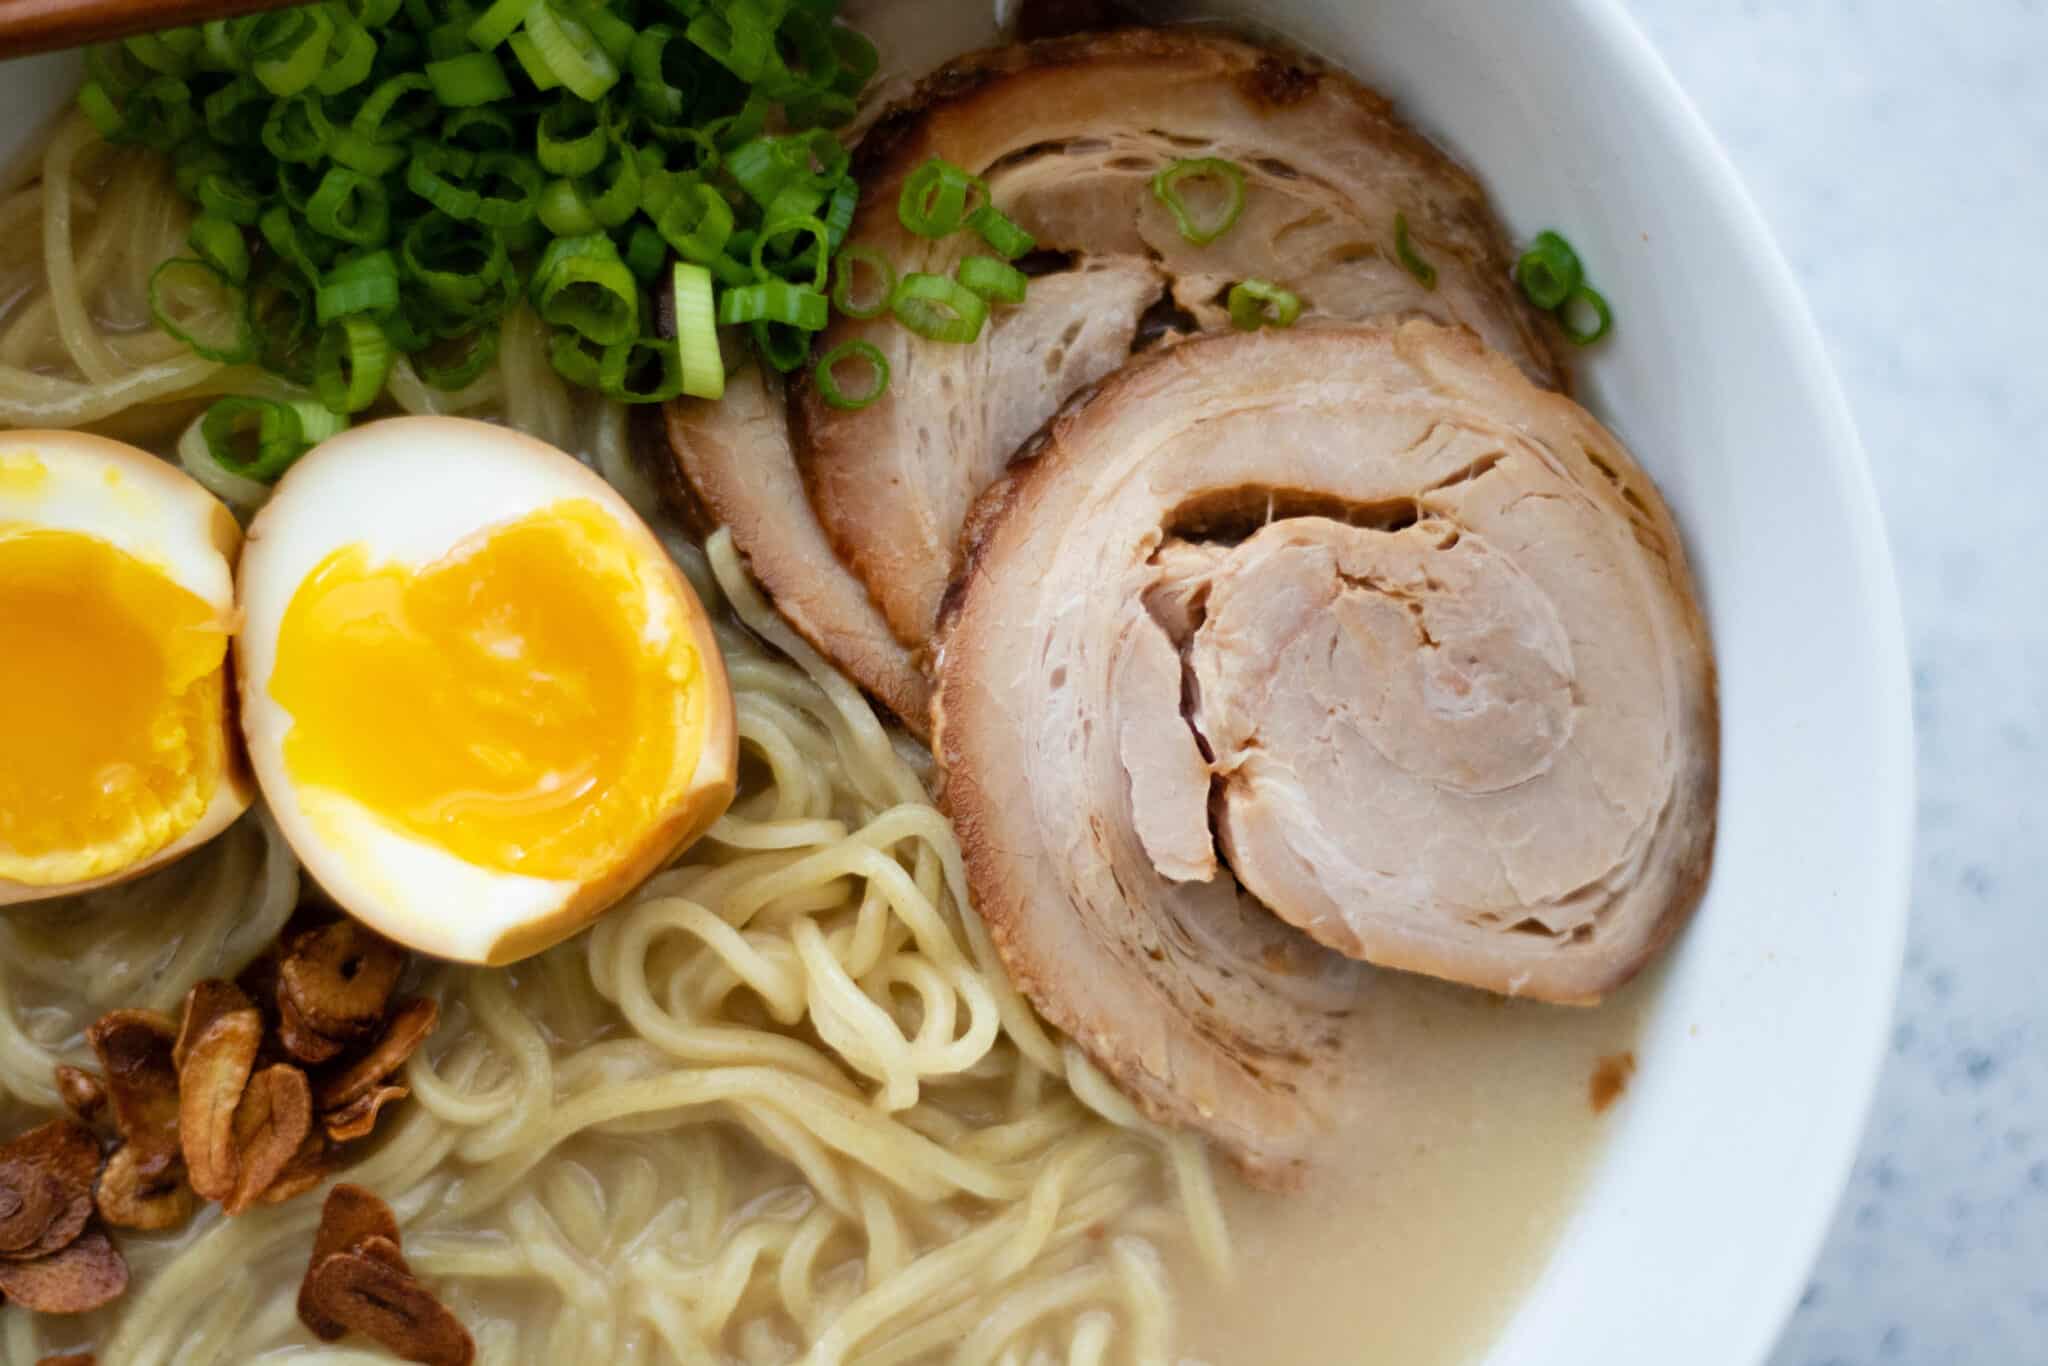
Like most of you, the only ramen I was familiar with in my youth was á la Top Ramen. Squiggly noodles that I sometimes ate raw, dusted with the msg-laden seasoning packet (don’t judge me). Homey, comforting, and satisfying, it was never difficult to turn to the kitchen cabinet for packages of ramen when feeling sick or in the typical college budget-dining times of my life. I can’t remember where I had my first bowl of legit ramen, but I was definitely in my mid-twenties. I can’t believe it took so long for me to be introduced to the glory that is a steaming bowl of pork, noodles and gelatinous broth. Since my maiden voyage into this Japanese soup, I have become a true believer and fanatic trying every new place that I can find. As with most foods, there are regional differences–different broths, noodles, proteins, toppings–but my favorite and possibly the king of all ramens is tonkotsu ramen. Made with an intensely porky, almost milky broth, tonkotsu is the only soup I want to reach for on a rainy day. Or hell, a 100 degree day. My love for ramen knows no weather-restricted bounds. The best, in my opinion, keep the toppings simple–some fried garlic chips, thinly sliced scallions, soft-yolk marinated eggs, and melt-in-your-mouth tender chashu pork belly.
Like many of the things I become obsessed with making at home, this is not a cost-effective or timely recipe to attempt. If you are blessed with being able to head to a small joint and get amazing ramen for $10-15 bucks, more power to ya. For those, like me, that sometimes feel like they’re in a culinary wasteland unless your idea of haute cuisine is tex-mex and burgers, I want a way to deliver amazing ramen to my table whenever I want. The broth takes at least one full day but I find that if I make more than I need I can freeze it and have one less thing to make the next time I want ramen. I use a mixture of chicken feet, pig feet (trotters), and chicken backs/bones. If you’ve got a good butcher in town, I recommend starting there for all your bone needs. Even if your shop doesn’t carry it regularly, most of the time butcher shops are happy to accommodate special requests. Hispanic and Asian markets are a great resource as well. Unlike the super-clear stocks and broths that I have been accustomed to making at various restaurants, ramen broth is intended to be milky and gelatinous.
While the french method of making stock requires the barest-hint of a simmer for hours on end to achieve broth so clear that you can read the date on a penny at the bottom of your pot, ramen is the opposite. Only with a hard, rolling boil are you able to break down the bone marrow, collagen, fat, and other goodies found in the bones which are then suspended in the liquid, giving it its opaque appearance. In terms of my aromatics, or other flavor additives, I’m pretty demure with my broth. Some onion, garlic cloves, peeled ginger and corn cobs are all that I add to my broth to maintain the cleanest and palest color possible. If you don’t have a stock pot, you’re going to want to invest in one. I picked up a 16qt pot at target for about $35 bucks and it’s already paid for itself a million times over. The trick to getting a clean, pale broth is to first bring your bones to a boil, then dump out the bones and water and rinse everything. Then, bones back into the pot, more water and bring on the hard boil. The initial rinse helps remove some of the gunk and pigment from the hemoglobin and myoglobin found in the muscle tissue. After that, it’s smooth, albeit long, sailing. I never season my broth when I make it since I always freeze at least 4 quarts of it. I season the broth to taste every time I warm a new one up.
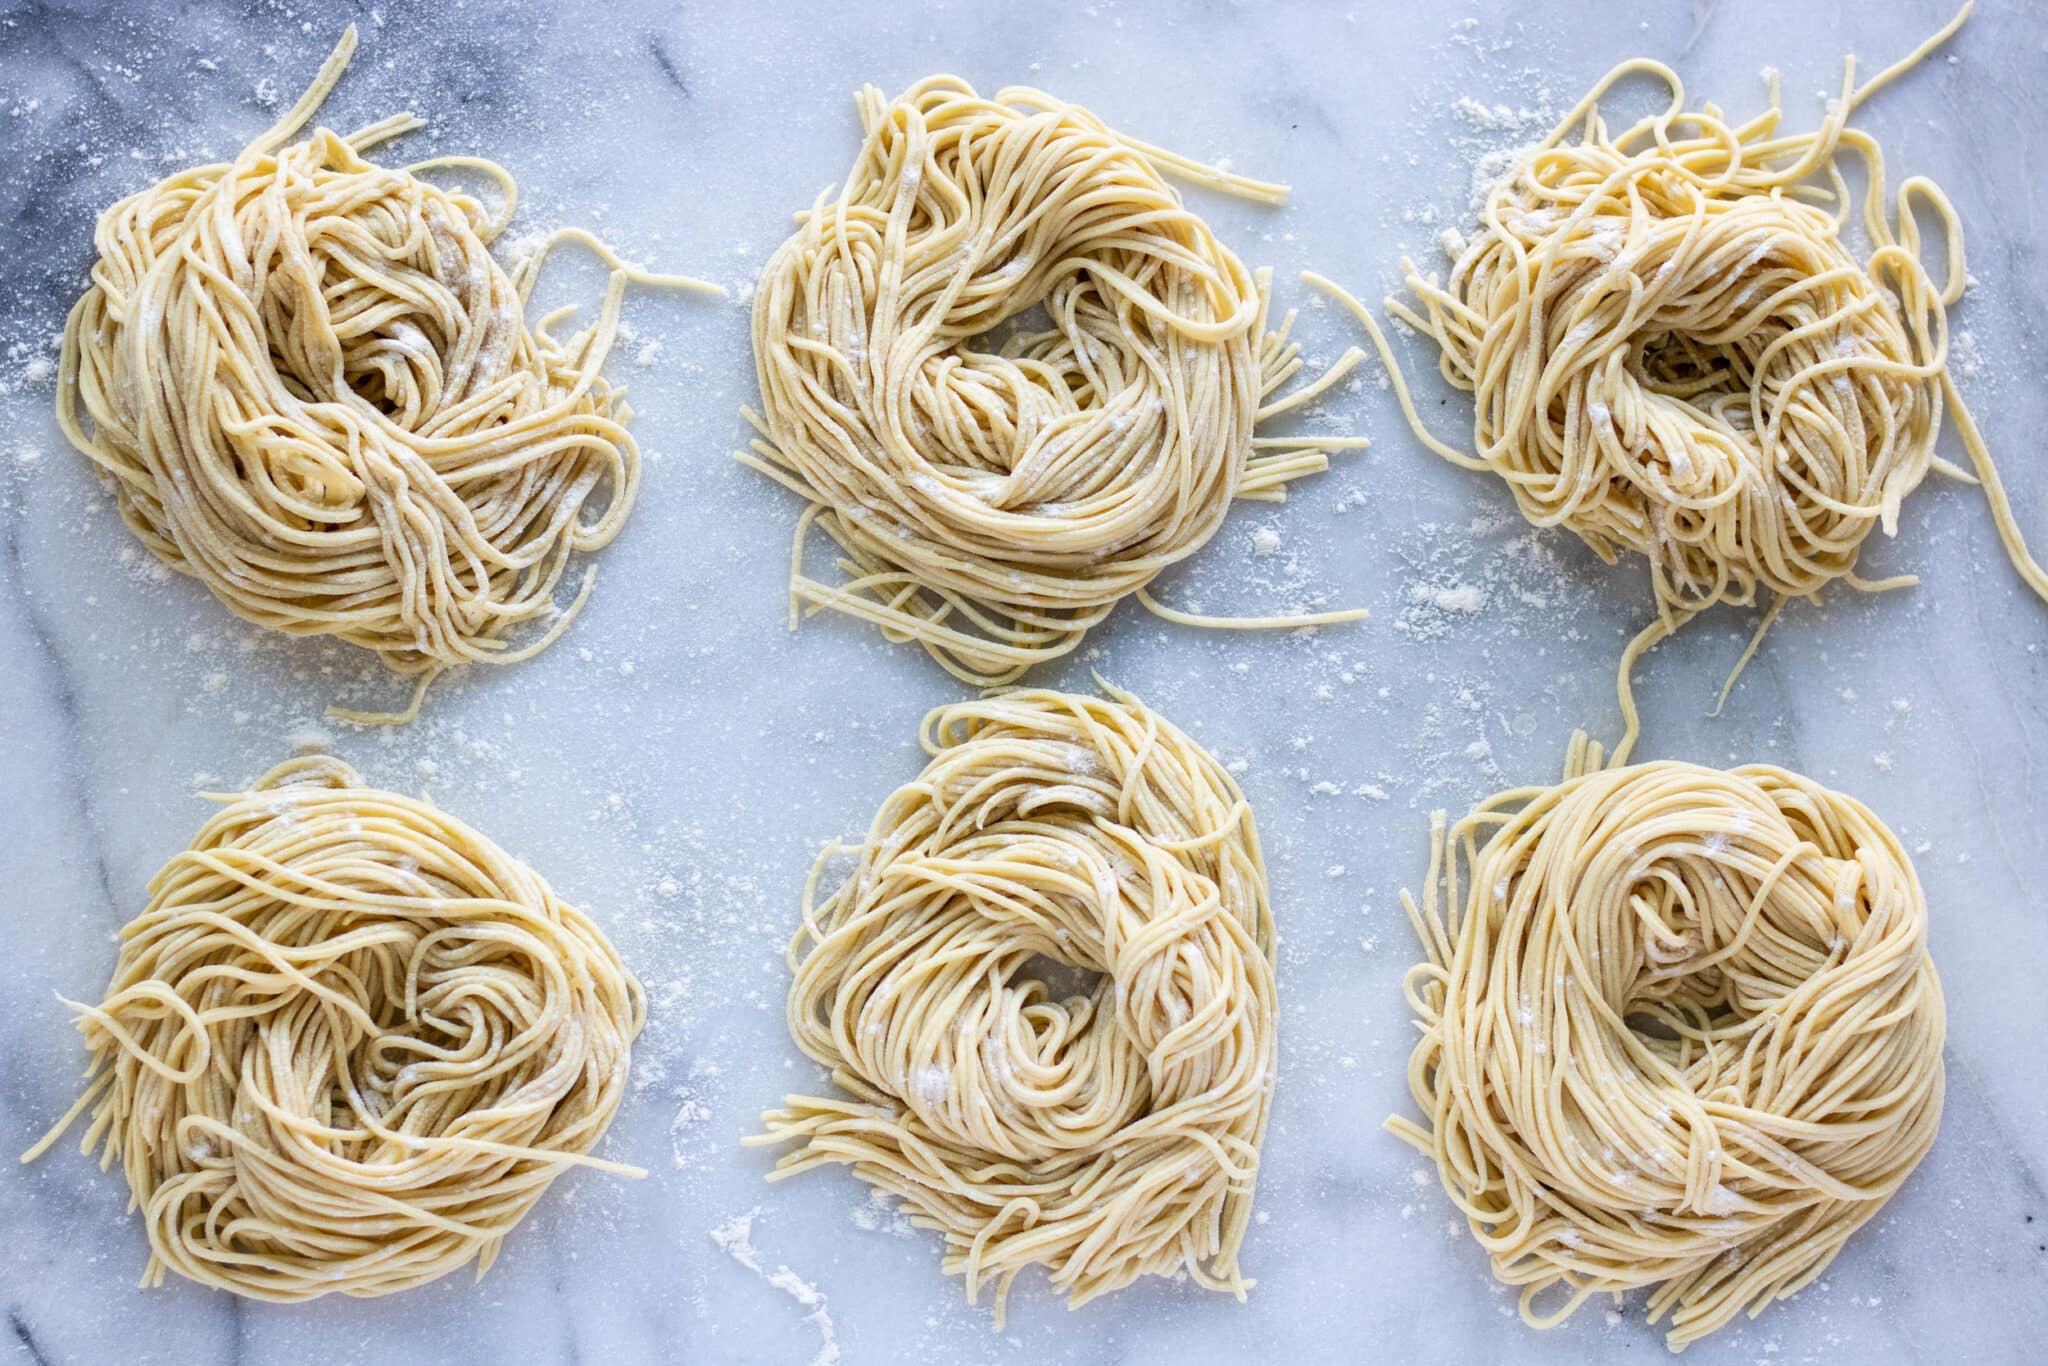
If the broth in a bowl of ramen is the most important element, noodles are a close second. They should be bouncy and chewy, with just enough salt and flavor to be memorable. I have read countless articles detailing that ramen noodles can’t be made well at home. Well, all I can say is that I have spent an exorbitant amount of time tweaking this recipe to achieve noodles that I’m happy eating at home. The first thing to know about ramen noodles is that they are alkaline (opposite of acidic). Sodium carbonate is used in the dough which helps the texture and flavor of the noodles and keeps them from dissolving in liquid (the dough does not contain eggs like many pasta doughs). So where do we find sodium carbonate? This is the fun, science-y part. Baking soda (sodium bicarbonate) when baked at a low temperature releases water and carbon dioxide and leaves behind sodium carbonate. SCIENCE! So, adding this baked baking soda to our noodle dough will achieve maximum chewiness and flavor. I actually don’t find the dough all that difficult to make.
There isn’t a very high liquid to flour ratio, but I was able to successfully make this just by kneading the dough by hand for a bit. You can also throw everything into the bowl of a stand mixer fitted with the dough hook and let your mixer do the work. I rolled my dough out using a pasta roller but I kept the dough thicker than I would if I was rolling, say, tagliatelle. The dough can be cut by hand after being rolled out, but I have a spaghetti cutter attachment for my pasta maker and I find that it’s the perfect size for ramen noodles. If you want to cut some corners to deliver ramen to your table more quickly and easily, shopping at your local asian market for fresh ramen noodles is always a great option. Unfortunately, the asian markets in San Antonio pale in comparison to what I became accustomed to in San Diego, so still I pioneer on.
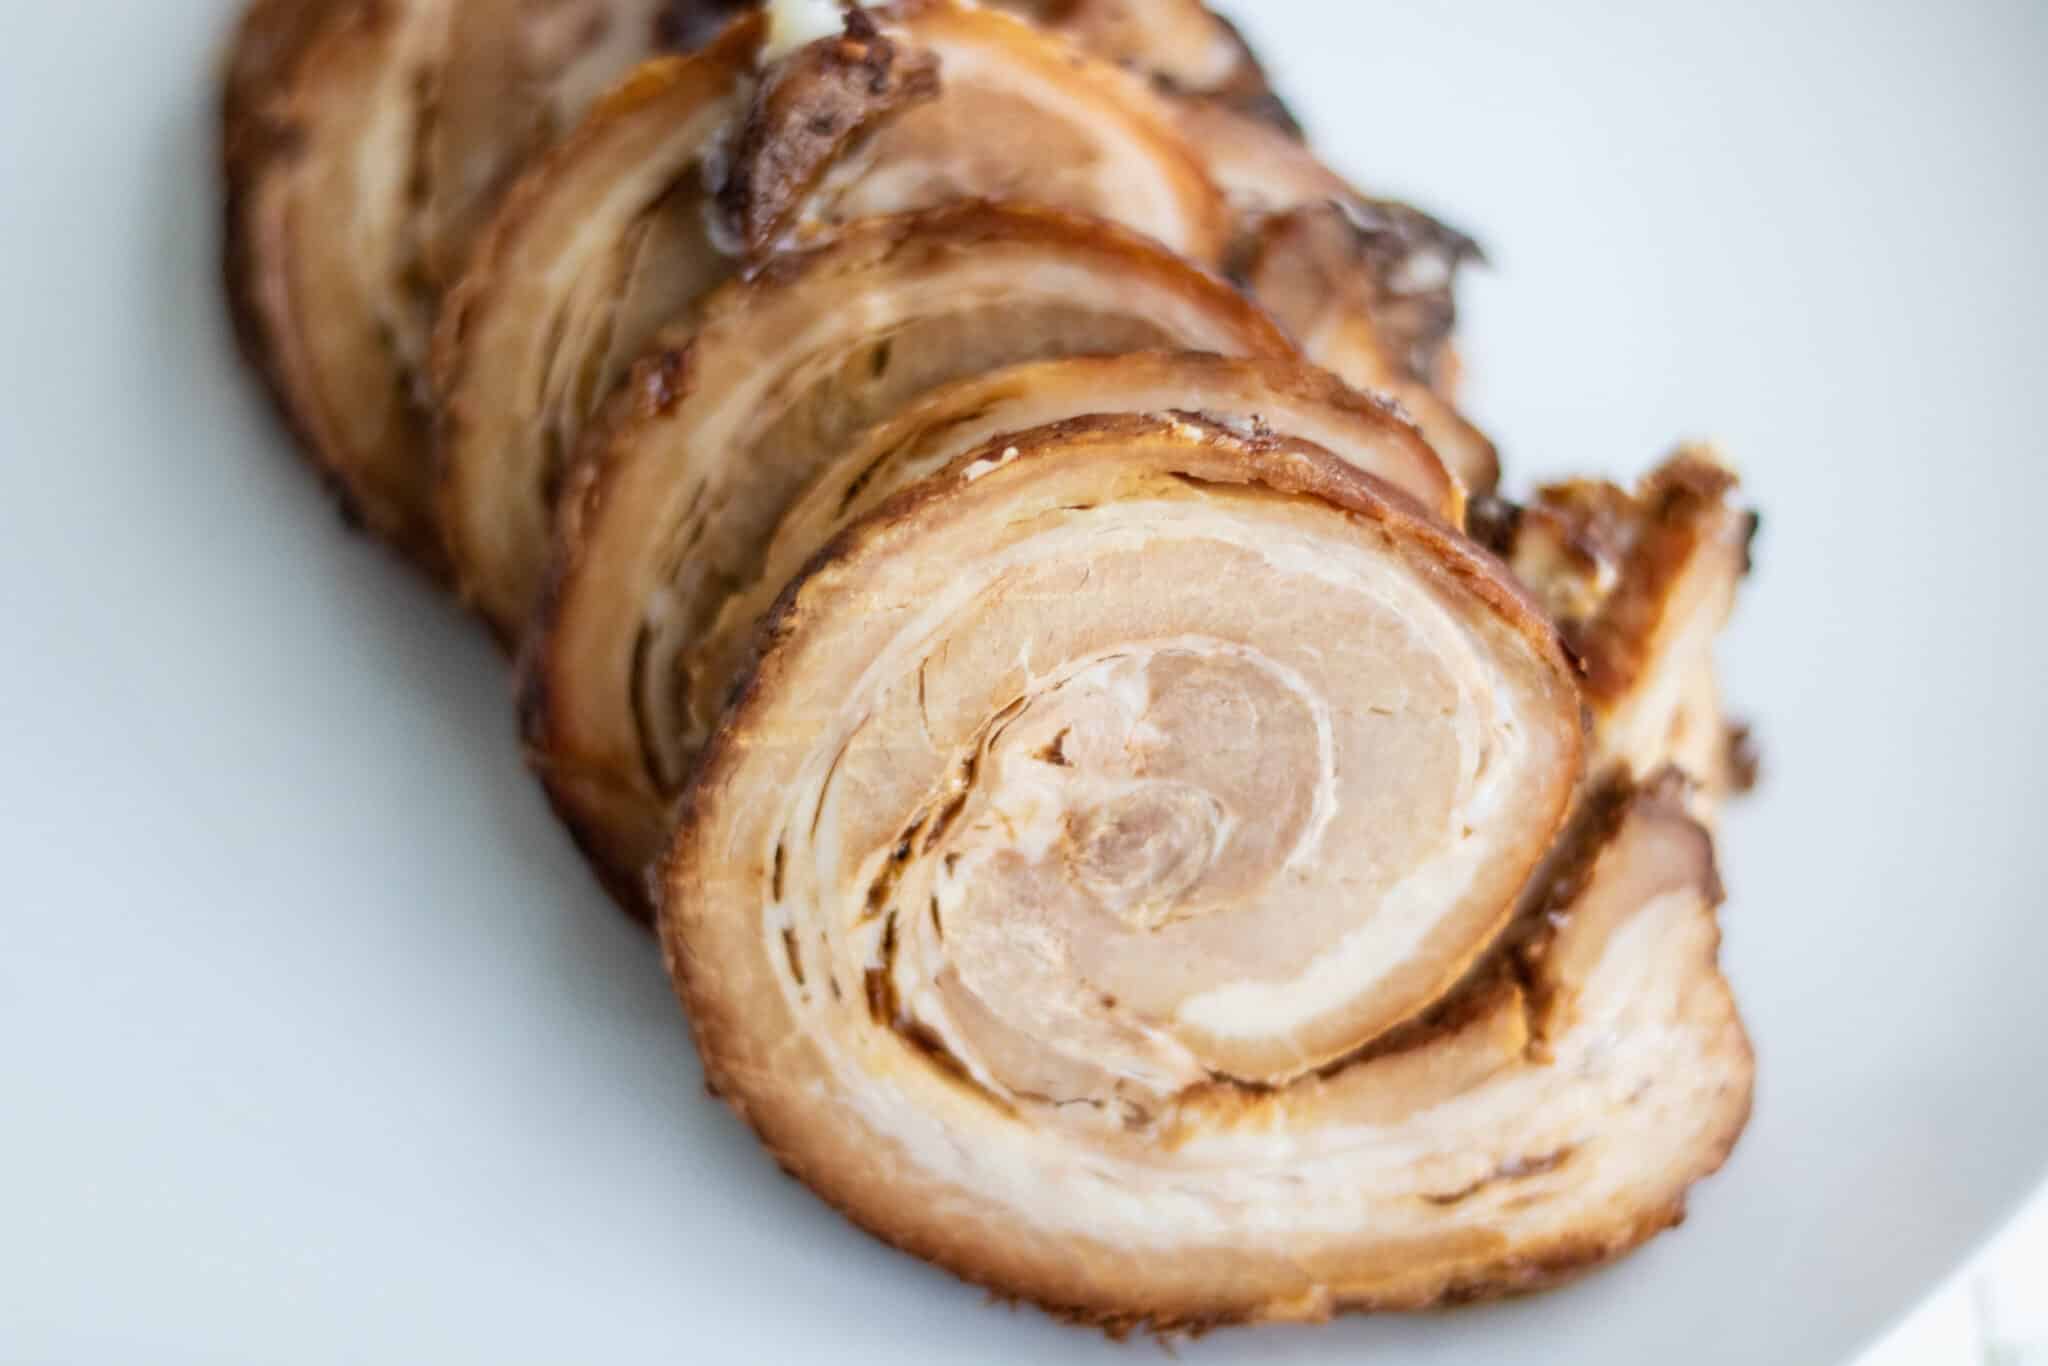
The pork belly chashu is my favorite part of the ramen. It’s flavorful and melt-in-your-mouth tender. The great part about making ramen at home? I will never skimp on the pork in my bowl of ramen. The process of making the pork is pretty straight forward but does take some time. I started with skinless pork belly (unfortunately my nearest butcher shop doesn’t sell skin-on) that was about 3lbs and already in the shape of a square. To be honest, this is more pork than you need but whenever I make ramen, I make extra of EVERYTHING. Extra broth, pork and noodles–all of which can be frozen. The pork belly is then rolled into a log and tied up with butcher’s twine. To achieve the tender texture, I slow cook my pork at 275 degrees F for about 4 hours or so in a mixture of water, soy, sugar, mirin, garlic, ginger and rice wine vinegar. Then the pork cools in the liquid. Once I remove the pork, I strain the liquid and use this to marinate my soft eggs–nothing goes to waste! You can even save the liquid after you’re done with your eggs for the next time you cook pork belly. I love saving braising liquids for future use because they just continue to develop flavor over time. I freeze what’s left over between uses and just add a little extra of all the ingredients next time I want to use it. My freezer is always like a freak science experiment with little bits of the most random stuff in there.

Beyond the broth, noodles and pork–the toppings are endless. Soft marinated eggs. Pink swirled fish cakes. Dried seaweed. Enoki mushrooms. Corn. Bamboo shoots. Black Garlic oil. Garlic Chips. and–gasp– kraft singles american cheese. Some people will consider me a heretic, but if Roy-freaking-Choi can add american cheese to his ramen, then so can I! You do not know the glory that is slightly melted cheese nuggets hidden within your chewy noodles, making your broth even creamier than it already is. Have fun with the process and good luck making your own exceptional bowl of ramen! As always, post any questions, tips or stories in the comments!
TONKOTSU RAMEN:
serves 4
sliced pork belly chashu (recipe below)
2 quarts ramen broth (recipe below)
1 lb ramen noodles, homemade (recipe below) or store bought
1/2 cup sliced scallions, green parts only (save whites for cooking pork belly)
6 cloves garlic, sliced very thin
1 tablespoon neutral oil, like canola
8 eggs
leftover pork cooking liquid (optional)
Start by cooking your eggs. Bring a slightly salted pot of water to a boil. Gently lower eggs into the boiling water and cook for 7 minutes and 20 seconds (yes, it’s that exact). Immediately transfer your eggs to a bowl of ice water and let cool for 20 minutes. Gently peel eggs, rinse them and place them in leftover pork cooking liquid, if using. Let marinate for 2 hours or overnight.
To make garlic chips, gently warm oil in a small nonstick pan. Add sliced garlic and cook over low heat until golden brown. Set aside and let cool.
Warm ramen broth in a sauce pot and season to taste with salt. Set aside. Bring a pot of water to a boil. Add noodles and cook for 3 minutes for homemade noodles. Keep an eye on your noodles, the baked baking soda will cause the water to boil over very quickly if you aren’t paying attention. If you’re using store bought ramen noodles, follow the package instructions. Using tongs, grab noodles from the water and transfer to the bowls you plan to eat your ramen in. Warm slices of pork in the ramen broth, and then place the pork over your noodles. Ladle broth over the top. Add marinated egg, scallions and garlic chips.
RAMEN BROTH:
makes 4-6 quarts
3lbs pork feet or trotters
1lb chicken feet
2lbs chicken backs and bones, any skin removed
1 onion, peeled
10 cloves garlic, peeled
1 inch piece of ginger, peeled and sliced
2 corn cobs, kernels removed (optional)
Place bones in the largest stock pot you have and cover with water. Bring to a boil. You’ll start to see grey foam floating to the top. At this point drain the liquid and bones into the sink. Rinse all the bones and return them to the pot with the onion, garlic, ginger and corn cobs. Cover with water and bring to a hard, rolling boil. Boil, checking every couple of hours for at least 12 hours, but closer to 24 hours. If the water level gets too low, add more water. After 4-6 hours you should notice that your broth is becoming more opaque and milky-looking. If you have to leave, or you know, sleep, top the pot off and reduce the heat to very low. As soon as you wake up, bring it back up to a rolling boil. Once your broth is ready, it should have reduced by at least half and look like slow bubbling mud. Strain broth through a fine mesh strainer into the largest container, or couple of containers, that you have. Let the broth cool and then remove any fat that has come to the surface. Broth can be frozen or seasoned and used immediately.
CHASHU PORK BELLY:
adapted from Serious Eats
2lbs pork belly, skin-on or skin-off, either is fine
2 cups water
1/2 cup soy sauce
2 tablespoons dark soy sauce
6 garlic cloves
white parts of 1 bunch of green onions
1 inch piece ginger, sliced
1/3 cup sugar
2 tablespoons rice wine vinegar
1/4 cup mirin
Roll pork belly into a log length-wise. Secure with butcher’s twine by tying a piece around the belly every inch or so. Place in a baking dish large enough to hold the pork and some liquid. An 8×8 baking pan or a larger loaf pan works well.
Preheat your oven to 275 degrees F. In a saucepan, warm water and sugar until dissolved. Mix in soy sauces, mirin and rice vinegar. Pour liquid over pork. Add garlic, ginger and white parts of scallions to the pan. Cover loosely with foil and bake for 4 hours. Uncover and bake 1 hour longer. Remove pork from the oven and allow to cool completely in the liquid. Remove pork and refrigerate for one hour (it’s easier to slice this way) or freeze for later use. Strain cooking liquid and reserve for future braises for for marinated soft eggs (see above).
ALKALINE NOODLES:
makes enough for 4, plus extra for freezing
120g warm water
8g baked baking soda (see notes below)*
120g cold water
325g bread flour
155g all purpose flour
7g salt
Dissolve baked baking soda in warm water. Add cold water. If mixing by hand, weigh flours and salt into a mixing bowl. Add liquid and mix by hand until a shaggy dough forms. Knead by hand until smooth, wrap and plastic and let rest for 1 hour. Alternately, dough can be mixed in a stand mixer fitted with the dough hook. Mix until smooth.
Divide dough into 4 equal pieces and keep the pieces that you aren’t using wrapped in plastic as they will dry out quickly. Take one piece of dough and press into a rectangle, dusting both sides with flour. Using a pasta roller (mine starts as 1 being the thickest setting), roll dough through the pasta machine, dusting with flour as necessary until setting 4 is reached. Your dough should not be thin enough to see through. Using the spaghetti cutter attachment, roll sheets of dough through the cutter and dust with flour. You can also cut the dough by hand with a knife but it can be a sticky dough, so dust your knife and the dough very well with flour. Repeat until all the dough has been used. Noodles can be frozen on a sheet tray dusted with flour or used immediately.
*to make baked baking soda: spread 1/2 cup baking soda on a rimmed baking sheet lined with foil. Bake in a 250 degree oven for 1 hour. Cool and store in an airtight container at room temperature.


Rate & Review This Recipe
[…] of baked baking soda, but you can save it in an airtight container for the future (or make these homemade ramen noodles!). Do you have to bake the baking soda? In my opinion, yes. You can try it with just regular baking […]